
How to Brine a Turkey for Roasting (Ultimate Guide for Juicy Perfection)
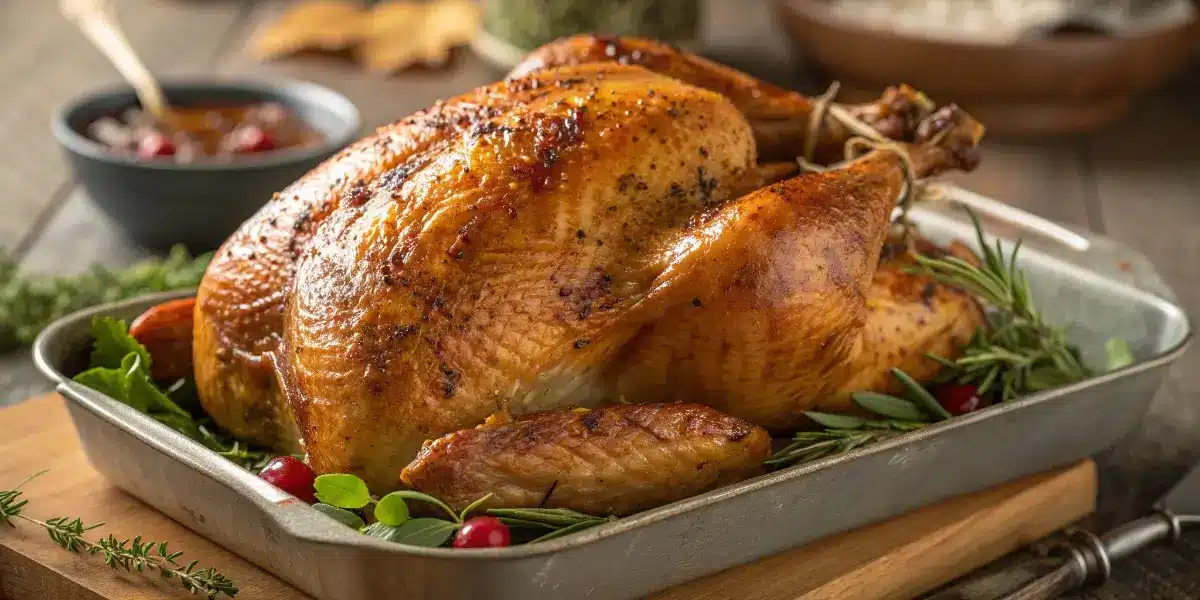
When it comes to roasting turkey, everyone dreams of a golden-brown, crispy skin wrapped around juicy, flavorful meat. But let’s face it—turkey often ends up dry and bland if not prepared correctly. That’s where brining comes in. Learning how to brine a turkey for roasting is the secret to achieving the perfect balance of tenderness and taste. Brining is more than a cooking trend; it’s a culinary science that enhances moisture and infuses deep flavors into your bird. Whether you’re hosting Thanksgiving dinner or preparing a special weekend meal, mastering the brine will change how you cook turkey forever.
To make the most of your brine, you’ll need to understand how salt works its magic, choose the right method (wet or dry brine), and know exactly how long to soak your bird. You’ll also explore aromatic flavor boosters that transform a simple roast into a feast. Looking for ways to season your bird after brining? Discover great ideas like Delicious Spiced Cajun Turkey Recipe for more inspiration.
Table of Contents
Understanding Why Brining Matters for Roasted Turkey
The Science Behind Brining a Turkey for Roasting
At its core, brining is a process that uses a salt-based solution to enhance the flavor and moisture of meat before cooking. When you submerge turkey in a saltwater brine, osmosis draws salt and liquid deep into the muscle fibers. This process not only seasons the meat internally but also helps it retain water during roasting, ensuring every bite is juicy and tender. Think of it as a moisture-locking technique that prevents your turkey from drying out in the oven’s intense heat.
Brining also alters the protein structure. The salt partially dissolves muscle proteins, allowing them to trap and hold onto more water. This means less moisture loss during cooking—a win-win for anyone tired of dry turkey breast. Even if you overcook the bird slightly, brining acts like a safety net, keeping it moist and flavorful.
Adding sugar to your brine helps balance the saltiness and encourages that picture-perfect caramelized skin. For even deeper flavor, aromatics like garlic, citrus, bay leaves, or rosemary infuse subtle notes into the meat. If you’ve never brined before, you’ll be amazed at the difference one soak can make.
How Brining Changes Texture, Moisture, and Flavor
When learning how to brine a turkey for roasting, it’s essential to know that this isn’t just about seasoning—it’s about transformation. The texture becomes noticeably more tender, and the flavor penetrates the entire bird rather than sitting on the surface. A well-brined turkey won’t just taste salted; it will taste savory, complex, and naturally juicy.
During roasting, the moisture retained from brining produces steam within the turkey’s muscle fibers. That internal steam keeps the meat supple while allowing the skin to crisp beautifully on the outside. The result? A balance between juicy interior and crispy, golden exterior—exactly what every home cook aims for.
To elevate your brine even further, check out the Pink Tibetan Salt Guide and discover why using mineral-rich salts can make your turkey flavor even more distinctive.
Choosing the Right Brine Method
Wet Brine vs. Dry Brine: Which Is Better for Roasting Turkey?
Before diving into how to brine a turkey for roasting, it’s important to know there are two main types of brines: wet and dry. Both methods serve the same purpose—retaining moisture and adding flavor—but they work differently.
Wet brining involves submerging the turkey in a saltwater solution. This classic approach guarantees juicy results because the entire bird absorbs liquid during the soaking period. It’s ideal if you have enough fridge space to hold a large pot or brining bag. The result is a bird that stays moist even if roasted a little longer than planned.
On the other hand, dry brining uses no liquid. Instead, you rub a salt-based seasoning mix directly on the turkey and let it rest uncovered in the fridge for 24 to 48 hours. This method is less messy and helps achieve an exceptionally crispy skin since the turkey air-dries during the process. The salt still works its magic by penetrating the meat, but without the need for gallons of liquid.
If you want a turkey that’s extra juicy with a more traditional flavor, wet brining is your best bet. However, if you prefer a cleaner process and crave ultra-crispy skin, dry brining may be your go-to choice.
To see another excellent example of how salt enhances flavor, check out Delicious Smoked Salmon Brine Recipe for technique inspiration.
When to Choose Each Method (Pros and Cons for Home Cooks)
Here’s a quick comparison to help you decide which method suits your kitchen and your taste preferences best:
| Brine Type | Pros | Cons |
|---|---|---|
| Wet Brine | Incredibly juicy meat; consistent seasoning; protects against overcooking | Requires large container; takes up fridge space; more cleanup |
| Dry Brine | Crispy skin; easy storage; no large containers needed | Can yield slightly less moisture than wet brine; requires precise timing |
When learning how to brine a turkey for roasting, consider your available space, time, and flavor goals. If you’re hosting a big holiday meal, wet brine ensures reliability and tenderness. But for everyday cooking or smaller gatherings, dry brining delivers impressive flavor with minimal effort.
Looking for inspiration? Try Pot Roast Seasoning to create a dry-brine-style rub with balanced salt and herbs that also works beautifully on turkey.
Ingredients Needed to Brine a Turkey for Roasting
Essential Brine Ingredients: Salt, Sugar, and Liquid Base
Every great brine starts with three key ingredients: salt, sugar, and liquid. These form the foundation of flavor and ensure that your turkey stays moist while roasting. The most important component is the salt, which draws moisture into the meat and keeps it juicy. Always choose kosher salt or sea salt—they dissolve easily and distribute flavor evenly. Avoid table salt; it’s too fine and can make the brine overly salty.
Sugar balances the sharpness of salt and enhances browning during roasting. You can use white sugar, brown sugar, honey, or even maple syrup depending on your flavor preferences. Sugar also helps create that deliciously caramelized, golden-brown crust that makes a roast turkey irresistible.
Next, you need a liquid base. Water is the most common choice, but many home cooks prefer using apple cider, chicken broth, or vegetable stock to add more complexity. Some even use sparkling water for richer undertones. The ratio for your base liquid typically depends on the size of the bird and the salt content, which we’ll cover in detail later.
If you’re learning how to brine a turkey for roasting for the first time, start simple—salt, sugar, and water. Then, experiment with aromatics as you gain confidence.
Learn more about mineral salts and flavor balance in the Pink Tibetan Salt Guide to refine your brine even further.
Optional Aromatics for a Flavorful Roast Turkey
To transform your turkey from good to unforgettable, add aromatics. These are the herbs, spices, and natural ingredients that infuse subtle yet distinct flavors throughout the meat. Popular options include:
- Herbs: rosemary, thyme, sage, bay leaves
- Spices: black peppercorns, allspice, cloves, mustard seeds
- Citrus: orange or lemon slices for brightness
- Aromatics: garlic, onion, or shallots for depth
Adding these ingredients to the brine elevates the taste, especially when paired with a flavorful roasting method. Imagine the aroma of garlic and citrus wafting through your kitchen as your brined turkey roasts to golden perfection.
You can also personalize your brine with seasonal touches like apple cider, cinnamon sticks, or maple syrup for a fall-inspired profile. For a more savory approach, toss in soy sauce, herbs de Provence, or even a splash of bourbon.
If you’re interested in flavor layering and seasoning ideas, don’t miss our Delicious Spiced Cajun Turkey Recipe — a great way to complement your brined turkey with bold Southern flair.
How to Prepare the Perfect Brine Solution
What Is the Formula for Turkey Brine? (Exact Salt-to-Water Ratio)
Getting the brine formula right is the foundation of any flavorful and juicy turkey. The standard ratio is 1 cup of kosher salt per gallon of water. This concentration ensures the salt effectively penetrates the turkey meat without overpowering it. For smaller birds (under 14 pounds), you can slightly reduce the salt to ¾ cup per gallon. Always remember: the goal is balance, not saltiness.
If you’re using table salt, reduce the amount to ½ cup per gallon, as it’s finer and denser. When using sea salt or Himalayan pink salt, measure by weight rather than volume for consistency.
For a richer brine, replace half the water with apple cider or vegetable stock. This adds natural sweetness and a savory depth that enhances the roasting flavors later on.
Here’s a quick reference table for various turkey sizes:
| Turkey Weight | Water Needed | Kosher Salt | Sugar (Optional) | Brine Time |
|---|---|---|---|---|
| 12–14 lbs | 2 gallons | 2 cups | 1 cup | 12–18 hours |
| 15–18 lbs | 2.5 gallons | 2.5 cups | 1¼ cups | 18–24 hours |
| 19–22 lbs | 3 gallons | 3 cups | 1½ cups | 24 hours |
Consistency matters. A well-balanced solution guarantees even salting and keeps your turkey juicy from the inside out.
Learn more about balancing salt and spices in the Pink Tibetan Salt Guide to perfect your brine ratios.
Step-by-Step Instructions for Mixing and Cooling the Brine
Follow these easy steps to prepare your turkey brine safely and effectively:
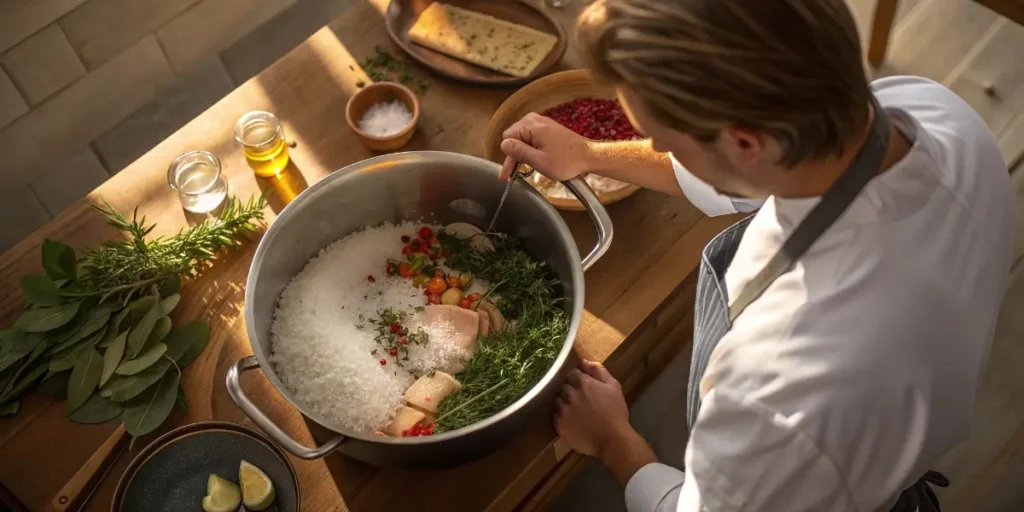
- Combine Ingredients: In a large pot, bring about 1 quart of water to a gentle simmer. Add salt and sugar, stirring until fully dissolved.
- Add Aromatics: Toss in your chosen herbs, spices, and aromatics (like garlic, bay leaves, and citrus slices). Let the flavors blend for about 5–10 minutes.
- Cool Completely: Remove from heat and pour in the remaining cold water or ice to cool the brine. Never submerge a turkey in warm brine—it must be completely cooled to below 40°F (4°C) to ensure food safety.
- Submerge Turkey: Once cool, place your turkey breast-side down in the brine, ensuring it’s fully submerged. If necessary, weigh it down with a plate.
- Refrigerate and Brine: Store the bird in the refrigerator for the recommended time based on its weight (see table above).
Proper cooling is crucial. Warm brine can cause bacterial growth and ruin the bird. If fridge space is tight, store your turkey in a cooler filled with ice packs to keep it safely chilled.
To explore brining principles for other meats, check out the Delicious Smoked Salmon Brine Recipe for cross-recipe inspiration on flavor balancing.
Step-by-Step: How to Brine a Turkey for Roasting
How Long Should You Brine a Turkey (Per Pound Guide)
Timing is everything when learning how to brine a turkey for roasting. The general rule is to brine your turkey 1 hour per pound when using a wet brine, or 45 minutes per pound for a dry brine. A small 12-pound bird, for example, should soak for about 12 hours, while a larger 20-pound turkey will need at least 20 to 24 hours.
Keep in mind, brining too long can make the meat overly salty and spongy in texture. If you plan to brine overnight, aim for 12–18 hours, ensuring the bird stays below 40°F (4°C) at all times. For a lighter brine flavor, you can cut the brining time in half and still notice a significant improvement in moisture and tenderness.
Here’s a quick time chart for reference:
| Turkey Weight | Wet Brine Duration | Dry Brine Duration |
|---|---|---|
| 10–12 lbs | 10–12 hours | 8–10 hours |
| 14–16 lbs | 14–16 hours | 12–14 hours |
| 18–20 lbs | 18–24 hours | 16–18 hours |
It’s best to plan your brining process a full day before roasting so you can rinse, dry, and season properly afterward.
If you’re experimenting with flavorful seasoning ideas post-brine, don’t miss our Pot Roast Seasoning — it’s a versatile blend that pairs beautifully with turkey and other meats.
How to Safely Submerge and Store Your Turkey While Brining
Once your brine is fully cooled and your timing is planned, it’s time to safely submerge the turkey. Follow these essential steps to ensure safety and flavor retention:
- Choose the Right Container: Use a large stockpot, food-grade bucket, or brining bag. Avoid aluminum containers, as they can react with salt and acid.
- Fully Submerge the Bird: Make sure your turkey is completely covered in the brine solution. Add water or ice if needed to maintain the level.
- Refrigerate During Brining: Keep your turkey at or below 40°F (4°C) throughout the entire brining process. If your refrigerator is full, use a cooler filled with ice packs.
- Rotate if Needed: If the turkey floats or isn’t fully covered, rotate it halfway through brining to ensure even salt absorption.
- Discard Used Brine: After removing the turkey, discard the brine immediately. Never reuse it for safety reasons.
For large gatherings, consider dry brining if refrigerator space is tight. The results are still juicy, and it requires less liquid and equipment.
If you want to take your turkey to the next level after brining, check out the Delicious Spiced Cajun Turkey Recipe — it pairs perfectly with a pre-brined bird for bold Southern-style flavor.
Special Tips for Large Turkeys (Including 20-Pound Turkey Brine Time)
How Long to Brine a 20-Pound Turkey Before Roasting
When handling a big bird, brining becomes even more crucial. A 20-pound turkey has dense muscle fibers that require more time to absorb moisture and flavor. The ideal brining time for a 20-pound bird is 20 to 24 hours in a wet brine or 16 to 18 hours for a dry brine. If you’re pressed for time, you can still achieve great results with a minimum of 12 hours, but the texture and juiciness improve dramatically with longer soaking.
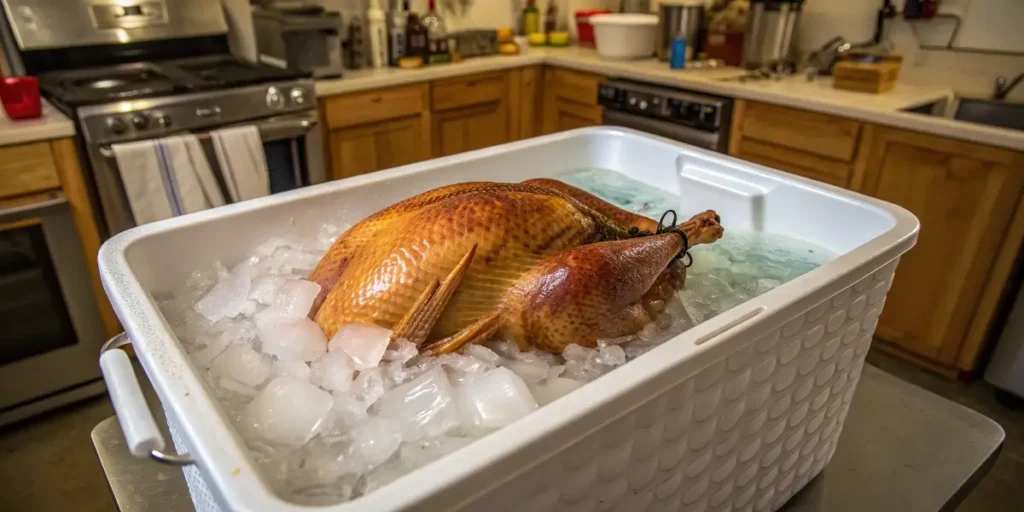
If your refrigerator doesn’t have enough space, use a large cooler lined with a food-safe bag. Fill it with the brine, add the turkey, then top it off with ice packs or sealed bags of ice to keep the temperature below 40°F (4°C). This method is especially helpful during the holidays when fridge space is tight.
Here’s a quick breakdown for large turkey brine timing and ratios:
| Turkey Weight | Water | Kosher Salt | Brine Time | Best Method |
|---|---|---|---|---|
| 18–20 lbs | 2.5–3 gallons | 2.5–3 cups | 20–24 hrs | Wet Brine |
| 20–22 lbs | 3 gallons | 3 cups | 24 hrs | Wet Brine |
| 18–20 lbs | N/A | 3 tbsp salt per 5 lbs | 16–18 hrs | Dry Brine |
Always remember—never brine longer than 30 hours, as the meat can become mushy. Once brining is complete, rinse the turkey thoroughly and pat it dry before roasting.
Looking for inspiration? Try Delicious Smoked Salmon Brine Recipe — you can adapt the same salt balance for large poultry brines too.
Temperature, Safety, and Storage Tips for Big Birds
Large turkeys pose a unique challenge because maintaining a consistent safe temperature is critical. The brine and turkey must always stay cold throughout the process. Food safety experts recommend keeping everything under 40°F to prevent bacterial growth.
Here are expert-approved tips to keep your large turkey safe while brining:
- Use a Cooler with a Thermometer: If brining outside the fridge, monitor the temperature every few hours using a probe thermometer.
- Add Ice Bags, Not Loose Ice: Sealed ice bags prevent the brine from becoming diluted.
- Rotate Periodically: Turn the turkey every 6 to 8 hours for even brining.
- Always Sanitize Equipment: After removing the turkey, clean and disinfect your cooler or brining container thoroughly.
- Dry Thoroughly Before Roasting: Any excess moisture can cause steaming, preventing crisp skin.
Discover great ideas like Pot Roast Seasoning to add extra layers of flavor after brining — especially helpful for large birds that benefit from spice blends under the skin before roasting.
Rinsing, Drying, and Preparing the Turkey for Roasting
How to Properly Rinse and Pat Dry After Brining
Once the brining process is complete, it’s time to prepare your turkey for roasting. This stage is just as critical as the brine itself. To begin, remove the turkey from the brine and place it in a clean sink. Discard the used brine immediately—it’s unsafe for reuse since it has been in contact with raw poultry.
Next, rinse the bird thoroughly under cold running water for about a minute on each side. This step removes excess salt and prevents the turkey from tasting overly salty once roasted. Be sure to rinse inside the cavity too. After rinsing, let the turkey drain for a few minutes.
Now, pat the turkey completely dry using paper towels. Moisture left on the surface will cause the skin to steam instead of crisp, so take your time here. You can even let the turkey rest uncovered in the refrigerator for 8–12 hours to air-dry—this creates an incredibly crispy, golden-brown skin when roasted.
For additional flavor depth, rub a little oil or butter under the skin before roasting. You can also use a spice mix, such as Pot Roast Seasoning, to infuse the meat with aromatic herbs and spices.

Why Air-Drying Before Roasting Ensures Crispy Skin
Air-drying is an often-overlooked secret to the perfect roast turkey. When you leave the turkey uncovered in the fridge, the cold air dehydrates the skin slightly, allowing it to brown and crisp beautifully in the oven. Combined with a good brine, this technique guarantees the best of both worlds—moist, tender meat and shatteringly crisp skin.
Here’s how to do it like a pro:
- After rinsing and drying, place the turkey on a wire rack over a baking sheet.
- Refrigerate uncovered for at least 8 hours (overnight is ideal).
- Before roasting, rub the skin with butter or olive oil to enhance browning.
This step also lets the salt fully distribute through the meat, balancing out the flavor. As a bonus, air-drying saves you time on the day of roasting since your turkey will already be prepped and ready to go.
If you want to experiment with unique flavor pairings, don’t miss our Delicious Spiced Cajun Turkey Recipe for an aromatic crust that pairs perfectly with a brined bird.
Expert Tips and Flavor Variations for Turkey Brine
Creative Liquid Bases for Brine (Apple Cider, or Broth)
When it comes to mastering how to brine a turkey for roasting, experimenting with different liquid bases can make all the difference. Water is the most common foundation, but swapping it out—or partially replacing it—with flavorful liquids adds layers of depth to your turkey.
Here are a few creative liquid ideas to elevate your brine:
- Apple Cider: Adds natural sweetness and a subtle tang that pairs beautifully with poultry. Perfect for Thanksgiving or fall gatherings.
- Broth or Stock: Using chicken or vegetable broth creates a savory backbone, giving your brine umami richness.
- Fruit Juice: A touch of white fruit juice (like orange or cranberry) can brighten the brine with gentle acidity.
You can mix and match these with herbs, citrus, and spices for a signature flavor profile. Just make sure the total liquid volume equals the amount of brine you need—typically one gallon per 12 pounds of turkey.
Learn more about enhancing your brine with natural minerals in the Pink Tibetan Salt Guide—perfect for those who want to fine-tune flavor balance.
Herbs, Spices, and Add-Ins That Elevate Roasted Turkey
A truly memorable roast starts with a flavor-packed brine. Beyond salt and liquid, your choice of herbs and spices can transform the turkey from simple to spectacular. Here are some expert-approved combinations to try:
| Flavor Theme | Ingredients | Flavor Profile |
|---|---|---|
| Classic Holiday | Bay leaves, thyme, rosemary, sage, black peppercorns | Traditional, aromatic, and savory |
| Sweet and Spicy | Brown sugar, cloves, cinnamon, chili flakes | Warm, bold, and balanced |
| Citrus Fresh | Lemon slices, orange peel, coriander seeds | Bright, zesty, and refreshing |
| Savory Herb | Garlic, onion, parsley, celery seed | Deeply savory and earthy |
For a touch of indulgence, add a splash of maple syrup or honey to your brine—it complements the turkey’s natural sweetness and creates beautifully browned skin when roasted.
If you’re craving something bold and Southern-inspired, check out our Delicious Spiced Cajun Turkey Recipe for a vibrant, spicy twist on the traditional roast.
Conclusion: Your Roadmap to the Juiciest Roast Turkey Ever
Brining is the ultimate step to ensuring your roasted turkey turns out juicy, flavorful, and tender every time. By following these steps—selecting the right brine method, balancing your salt-to-water ratio, and managing timing—you can achieve professional-level results at home. Whether it’s Thanksgiving or an everyday feast, knowing how to brine a turkey for roasting will forever change your cooking game.
Don’t forget: rinse and dry your turkey before roasting, experiment with unique liquids like apple cider, and season with care. For more flavor inspiration, check out Delicious Spiced Cajun Turkey Recipe — a bold twist that perfectly complements your next brined turkey.
FAQs
How long should a turkey stay in the brine?
A turkey should stay in the brine for about 1 hour per pound when using a wet brine. For example, a 12-pound turkey should brine for 12 hours, while a 20-pound bird needs closer to 24 hours. If you prefer a dry brine, aim for 45 minutes to 1 hour per pound. Brining for too long can make the texture overly soft, so avoid going past 30 hours. Always refrigerate your turkey below 40°F (4°C) during the process.
What is the best brine method?
The “best” brine method depends on your goals and available space. If you want maximum juiciness and flavor penetration, go for a wet brine. However, if you prefer crispier skin and an easier cleanup, dry brining is the better option. Both methods enhance moisture and tenderness—you can’t go wrong with either.
What liquid should you brine a turkey in?
The base liquid is typically water, but you can replace part of it with apple cider, broth, or fruit juice for a flavor boost. Apple cider adds sweetness, while broth contributes umami depth. You can also mix in citrus juice for brightness. Always make sure the liquid is cold before submerging your turkey to maintain food safety.
How long to brine a 20-pound turkey?
A 20-pound turkey needs at least 20–24 hours in a wet brine or 16–18 hours in a dry brine. Because larger birds have denser muscle fibers, they require more time for the salt and flavor to penetrate fully. Keep the brine and turkey below 40°F (4°C) during the entire process.
Does brining a turkey really make a difference?
Absolutely. Brining prevents the meat from drying out and enhances flavor from the inside out. It tenderizes the meat, adds seasoning throughout, and keeps the bird juicy even if you overcook slightly. Once you’ve tried a brined turkey, you’ll never skip the step again—it’s the secret to restaurant-quality results at home.
What is the formula for brine?
The classic brine formula is 1 cup kosher salt per gallon of water. Optionally, add ½ to 1 cup of sugar for balance and caramelization. For every gallon of brine, include aromatics like garlic, herbs, and citrus to customize the flavor. Adjust the ratio slightly depending on the turkey’s weight and your salt type (reduce by half if using table salt).