
How to Grow, Harvest, and Use Spaghetti Squash Seeds
If you’ve ever carved open a spaghetti squash, you’ve likely scooped out a pile of seeds and tossed them without a second thought. But what if those little seeds could become the start of your own garden, or even your next crunchy snack? In this guide, we’ll walk you through everything you need to know about spaghetti squash seeds—from eating and roasting them to saving, drying, and planting them for a bountiful harvest.
Whether you’re curious about planting spaghetti squash seeds from a grocery store squash, want to avoid common gardening mistakes, or simply want to understand when and how to grow these seeds for maximum yield—this guide has it all. You’ll also find practical answers to FAQs like: Can you eat spaghetti squash seeds? or What should you not plant near spaghetti squash?
Don’t miss our Homemade Canned Spaghetti Sauce for ideas to use with your homegrown squash!
Table of Contents
Understanding Spaghetti Squash Seeds
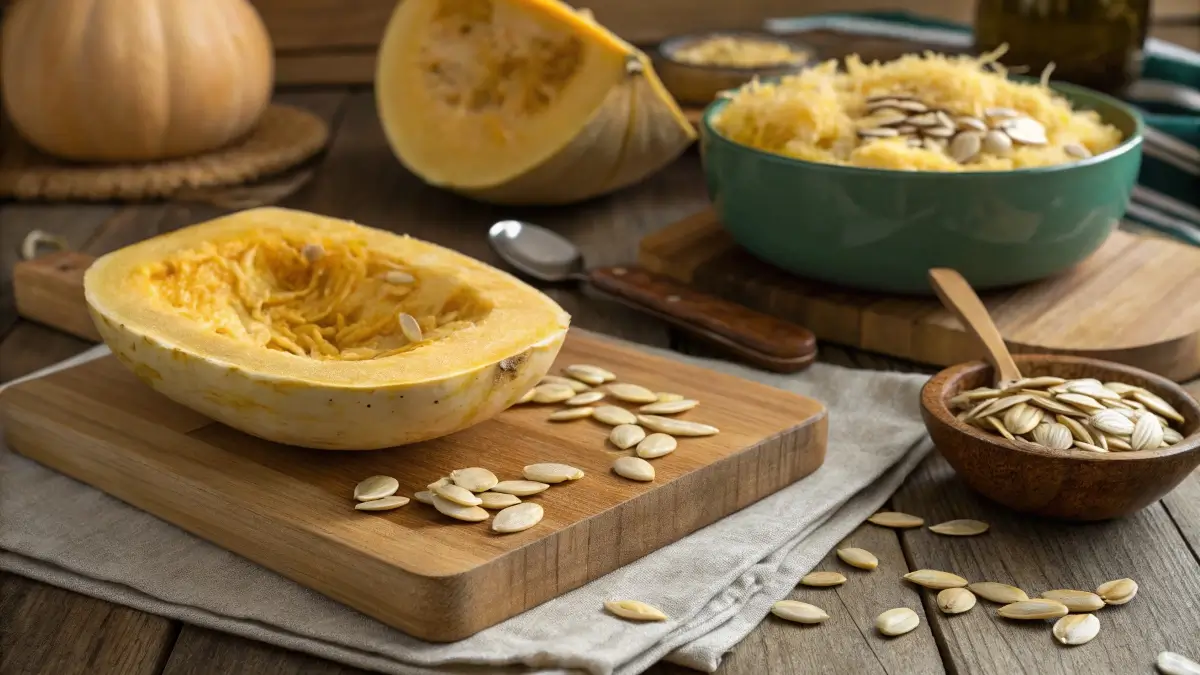
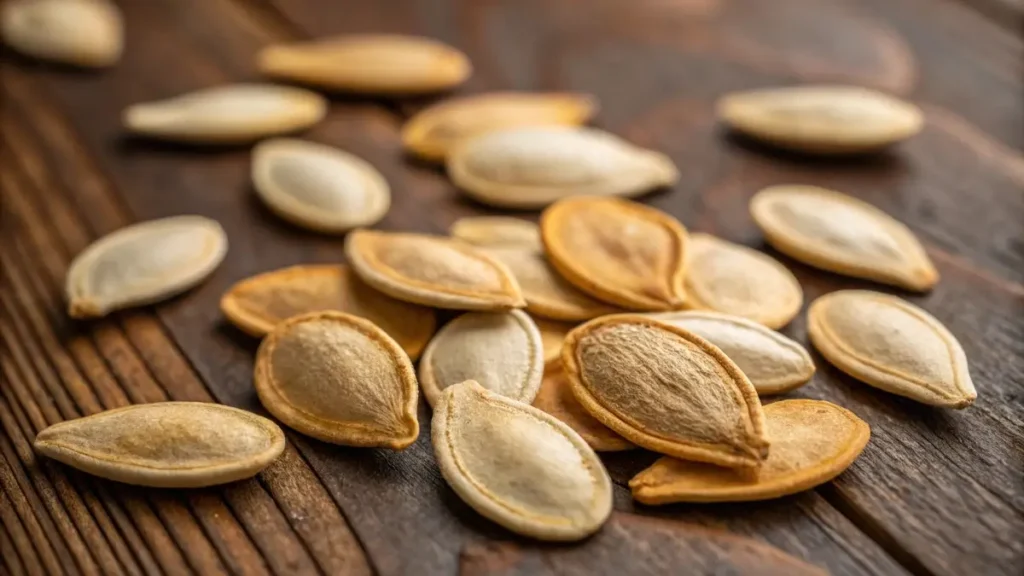
What Are Spaghetti Squash Seeds?
Spaghetti squash seeds come from the inner cavity of the mature fruit and resemble pumpkin seeds in size, shape, and structure. They have a hard outer shell, a white or pale yellow color, and a soft core rich in oils and nutrients. Each spaghetti squash contains about 50–80 seeds, depending on the size and maturity of the squash.
Like other members of the Cucurbita pepo family, spaghetti squash produces seeds that are relatively easy to handle, making them perfect for beginners who want to experiment with seed saving or growing their own food at home.
Table: Key Characteristics of Spaghetti Squash Seeds
| Feature | Description |
|---|---|
| Size | Medium (similar to pumpkin seeds) |
| Color | White to pale yellow |
| Texture | Firm, slightly fibrous |
| Edible Raw or Roasted | Yes |
| Viable for Planting | Yes (if mature and dried properly) |
| Stored Life | 3-6 years when dried and stored correctly |
Nutritional Profile and Uses of Spaghetti Squash Seeds
These seeds pack a surprising punch of nutrition. When roasted, spaghetti squash seeds are not only delicious but also healthy. Here’s why they deserve a spot in your pantry or your garden:
- Protein: About 5g per ounce, great for plant-based diets.
- Healthy Fats: High in omega-6 fatty acids and monounsaturated fats.
- Fiber: Aids in healthy digestion and promotes a lasting feeling of fullness.
- Micronutrients: Rich in magnesium, zinc, and iron—essential for immunity and energy.
Common Uses:
- Roasted as a snack (like pumpkin seeds).
- Added to granola or trail mix.
- Ground into flour for gluten-free baking.
- Saved for planting next season.
Looking for inspiration? Try our Gluten-Free Summer Salads and sprinkle roasted squash seeds on top for a crunchy finish.
Can You Eat the Seeds of Spaghetti Squash?
Is It Safe to Eat Spaghetti Squash Seeds Raw or Cooked?
Yes, you can absolutely eat the seeds of spaghetti squash. In fact, they are edible both raw and cooked, though roasting is the most popular—and tastiest—method. Unlike some other squash seeds, spaghetti squash seeds have a softer shell and are easier to chew once cooked. However, eating them raw may be tough on the stomach and less flavorful.
Before consuming, it’s important to clean the seeds thoroughly by removing any stringy pulp and rinsing them under cool water. For best taste and digestibility, dry and roast them.
Pro Tip: Never eat moldy or unwashed seeds. They can harbor bacteria or fungi that could cause digestive issues.
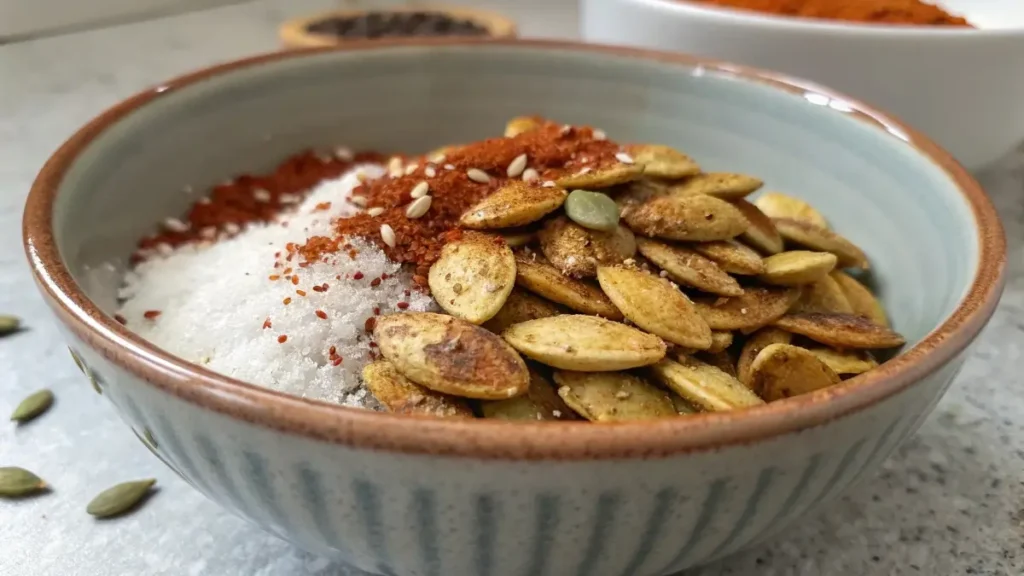
Roasting Spaghetti Squash Seeds: Flavor, Texture, and Recipes
Roasting brings out the nutty, savory flavor in spaghetti squash seeds. They’re a perfect zero-waste snack that’s high in protein and crunch.
Basic Roasted Spaghetti Squash Seed Recipe:
- Clean the seeds thoroughly and pat dry.
- Preheat oven to 300°F (150°C).
- Toss seeds with 1 tablespoon of olive oil and a pinch of sea salt.
- Optional flavorings: smoked paprika, garlic powder, cinnamon sugar.
- Arrange the seeds evenly in one layer on a baking sheet lined with parchment paper.
- Roast for 20–30 minutes, stirring halfway, until golden and crispy.
Want to make it a savory topping? Add roasted seeds to soups or salads. They also go well in Edamame Spaghetti Recipes for an extra layer of texture.
Table: Popular Roasted Squash Seed Seasoning Ideas
| Flavor Profile | Ingredients Used |
|---|---|
| Classic Savory | Olive oil, sea salt |
| Spicy | Chili powder, cayenne, black pepper |
| Sweet | Cinnamon, nutmeg, brown sugar |
| Mediterranean | Garlic, rosemary, thyme |
| Smoky BBQ | Paprika, cumin, smoked salt |
Don’t miss our Baby Dutch Yellow Potatoes Recipe, which pairs perfectly with a handful of roasted squash seeds for a wholesome side dish.
When and How to Plant Spaghetti Squash Seeds
Ideal Time of Year for Planting Spaghetti Squash Seeds
Timing is everything when planting spaghetti squash seeds. These warm-season vegetables are frost-sensitive and thrive in the heat of late spring and summer. The best time to plant spaghetti squash seeds outdoors is 2 weeks after the last spring frost, once the soil temperature consistently reaches above 60°F (15.5°C).
For most U.S. gardening zones (5 through 9), this falls between late April and early June. If you live in cooler climates, you can start seeds indoors 3–4 weeks before the last expected frost and transplant them when it’s warm enough.
Key Planting Timeline by USDA Zone:
| USDA Zone | Start Indoors | Transplant Outdoors | Direct Sow |
|---|---|---|---|
| Zone 5 | Early April | Mid-May | Late May |
| Zone 6 | Late March | Early May | Mid-May |
| Zone 7 | Mid-March | Late April | Early May |
| Zone 8–9 | Early March | Mid-April | Late April |
If you’re already planning your growing season, don’t miss our guide on Lemon Balm Tea —another great garden-to-kitchen plant!
Soil, Temperature, and Climate Requirements for Germination
Spaghetti squash seeds are not picky, but they perform best under the right soil and environmental conditions. To improve germination rates and support strong seedling development, follow these soil and climate tips:
1. Soil Type & Preparation
- Soil pH: 6.0 to 6.8 (slightly acidic)
- Drainage: Well-drained, loamy or sandy soil
- Fertility: Enriched with compost or organic matter
- Spacing: 36 to 60 inches between plants
Before planting, amend your soil with aged compost or a balanced organic fertilizer. This ensures young seedlings have the nutrients they need to thrive.
2. Temperature Needs
- Optimal soil temp for germination: 70°F to 95°F
- Minimum air temp for transplanting: 60°F
- Frost sensitivity: High — protect young plants from cold snaps
3. Water & Light Requirements
- Sunlight: Full sun (6+ hours daily)
- Watering: 1–1.5 inches per week; avoid wetting foliage to prevent disease
Looking for inspiration? Try Butterfly Pea Flower for a companion tea garden near your squash patch.
How to Save and Prepare Spaghetti Squash Seeds for Planting
Extracting and Cleaning Seeds from a Fresh Squash
Saving seeds from a fresh spaghetti squash is an easy, rewarding process that ensures you’re reusing nature’s bounty. But not all seeds are created equal—only mature, open-pollinated varieties will grow successfully.
Follow these steps to extract and clean your seeds properly:
- Select a Fully Ripe Squash
Choose spaghetti squash that has a rich yellow color and tough, unblemished skin. The ripest fruits produce the healthiest seeds. - Cut and Scoop
Slice the squash lengthwise and use a spoon to scoop out the stringy center along with the seeds. - Separate Seeds from Pulp
Transfer the pulp and seeds into a bowl filled with water. Swirl gently to loosen the seeds—they’ll sink while the pulp floats. Discard pulp and damaged seeds. - Rinse and Strain
Place clean seeds in a fine-mesh strainer and rinse thoroughly under cool water. - Pat Dry
Spread seeds on a paper towel or a clean dishcloth and blot gently to remove excess moisture.
Bonus Tip: Use some of the leftover pulp in soups or compost it for garden fertilizer. For more squash-inspired dishes, check out our Homemade Canned Spaghetti Sauce.
Do You Need to Dry Spaghetti Squash Seeds Before Planting?
Yes—drying is essential. Planting wet or freshly cleaned seeds increases the risk of rot, fungus, or complete germination failure. Here’s how to do it right:
How to Properly Dry Spaghetti Squash Seeds:
- Surface Dry: After rinsing, spread seeds in a single layer on a non-porous surface like wax paper or a ceramic plate.
- Location: Place them in a cool, dry area with good airflow, away from direct sun exposure.
- Turn Seeds Daily: Flip or stir seeds once per day to ensure even drying.
- Drying Time: 5–10 days depending on humidity levels. Seeds should feel crisp and snap in half when bent.
Once dry, store seeds in a paper envelope or glass jar labeled with the squash type and date. Keep in a cool, dark drawer or pantry. Properly stored seeds remain viable for up to 6 years.
Can You Plant Spaghetti Squash Seeds from Store-Bought Squash?
How to Choose Grocery Store Squash for Viable Seeds
Many home gardeners wonder: Can I plant spaghetti squash seeds from the squash I just bought at the supermarket? Yes, you can—but there are a few important factors to keep in mind.
Not all grocery store spaghetti squash will yield successful plants. The seeds must come from mature, non-hybrid (open-pollinated) fruits. Here’s how to pick the right one:
- Look for Heirloom or Organic Labels
Squash labeled heirloom, organic, or non-GMO is more likely to be open-pollinated. These seeds produce true-to-type plants. - Avoid Hybrid Varieties (F1 Hybrids)
Most commercial squash is a hybrid (marked as “F1”). These can grow, but often result in weak plants or unexpected fruit due to genetic variability. - Pick Fully Ripened Squash
Grocery store squash must have fully hardened yellow skin and no green patches. Immature fruits may not contain viable seeds. - Inspect for Damage or Decay
Any signs of rot or mold on the squash should disqualify it for seed harvesting.
Once you’ve selected your squash, extract and dry the seeds following the steps from Part 4. Store for 6 months before planting to improve germination rates.
Tips for Growing Squash from Non-Hybrid Grocery Store Varieties
You’ve dried and saved seeds from a promising spaghetti squash—now what? Here’s how to ensure your grocery store seeds perform well in the garden:
1. Conduct a Germination Test
Before planting a full batch, test a few seeds:
- Place 10 seeds in a damp paper towel.
- Seal in a plastic bag and keep warm (70°F).
- Check after 7–10 days. If 7+ germinate, the batch is viable.
2. Start Indoors If You’re Unsure
Starting seeds indoors allows you to control temperature and light, improving success for possibly weak grocery store seeds.
3. Be Ready for Surprises
Even open-pollinated squash grown near other squash varieties may cross-pollinate. This could result in different-looking fruits.
4. Use Healthy Soil and Compost
Provide nutrient-rich, well-drained soil. Grocery store seeds may lack the vigor of professional seed packets, so feed them well.
Germination Troubleshooting Table
| Problem | Likely Cause | Fix |
|---|---|---|
| No sprouting | Seeds immature or dead | Use heirloom, fully dried seeds |
| Mold on seedlings | Wet soil or poor air circulation | Improve drainage, reduce watering |
| Thin, weak seedlings | Low light or poor seed quality | Add grow lights or start over with new seeds |
Trying store-bought seeds is a budget-friendly experiment. If you’re feeling adventurous, check out our Edamame Spaghetti Recipe for more homegrown kitchen inspiration.
Companion Planting with Spaghetti Squash
What You Should Not Plant Next to Spaghetti Squash
While spaghetti squash is fairly adaptable, some plants make poor companions and should be kept at a distance. The wrong neighbors can increase pest risks, reduce yields, or compete for nutrients. Here’s a quick list of what not to plant alongside spaghetti squash:
- Potatoes
Potatoes and squash are both heavy feeders. When planted together, they compete for nutrients and water, weakening both crops. - Brassicas (Cabbage, Broccoli, Kale)
These cool-season crops have different growing requirements and can inhibit squash growth by competing for similar root space. - Other Cucurbits (Cucumbers, Melons, Pumpkins)
While they may seem like natural neighbors, planting different cucurbits nearby increases the risk of cross-pollination, especially if you’re saving seeds. It also attracts shared pests like squash bugs and cucumber beetles. - Fennel
Fennel secretes compounds that can inhibit the growth of many plants, including squash. Always plant it well away from your vegetable beds. - Sunflowers
Though beautiful, sunflowers can cast too much shade and may attract aphids and ants—two pests that love squash.
Table: Plants to Avoid Planting Near Spaghetti Squash
| Do Not Plant With | Reason |
|---|---|
| Potatoes | Compete for nutrients and space |
| Cabbage family | Different climate/pest issues |
| Cucumbers and melons | Cross-pollination, pests |
| Fennel | Allelopathic effect (growth inhibitor) |
| Sunflowers | Shade and pest attraction |
Best Companion Plants to Maximize Growth and Yield
While some plants cause problems, others offer big benefits. Companion planting helps reduce pests, enrich the soil, and improve squash growth. Here are the best choices for planting near spaghetti squash:
1. Marigolds
Natural insect repellents that deter aphids, whiteflies, and even nematodes in the soil.
2. Nasturtiums
These flowers act as a “trap crop” by drawing pests like squash bugs and aphids away from your squash vines.
3. Corn
Tall corn provides light shading and some natural support for squash vines, especially in compact gardens.
4. Beans
Beans fix nitrogen in the soil, which benefits heavy feeders like squash. Bush beans are especially great around the garden’s edge.
5. Oregano and Basil
Strong-scented herbs confuse insects and help ward off squash beetles.
Ideal Companion Planting Layout Example:
| Plant | Benefit |
|---|---|
| Marigold | Pest control |
| Corn | Shade and light structure |
| Bush beans | Nitrogen fixer |
| Basil/Oregano | Pest confusion through fragrance |
| Nasturtium | Pest attraction and pollinator boost |
Want to bring color and pest control together? Don’t miss our Gluten-Free Summer Salads, which pair well with fresh herbs and garden vegetables.
Spaghetti Squash Seed Germination and Seedling Care
Germinating Squash Seeds Indoors vs. Outdoors
Whether you’re working with seeds you’ve saved or store-bought ones, knowing when and where to germinate them can set your season up for success.
1. Germinating Indoors
Starting spaghetti squash seeds indoors allows for a longer growing season, especially in cooler climates (Zones 3–6). Start seeds 3–4 weeks before your last frost date.
Steps for Indoor Germination:
- Use biodegradable pots or seed trays filled with light seed-starting mix.
- Sow seeds 1 inch deep and keep the soil moist but not soggy.
- Maintain a temperature between 70°F and 95°F for ideal germination.
- Place under grow lights or in a sunny window for at least 12–14 hours of light daily.
- Seeds usually germinate in 5 to 10 days.
2. Direct Sowing Outdoors
In warmer zones (7–10), you can plant seeds directly into the ground once the soil is consistently above 60°F. Choose a full sun location and space seeds 3–4 feet apart for healthy vine growth.
Comparison Table: Indoor vs Outdoor Germination
| Method | Best For | Pros | Cons |
|---|---|---|---|
| Indoors | Cooler climates | Early start, controlled setting | Requires transplanting |
| Direct Outdoor | Warm climates | Less transplant shock | Risk of weather and pests |
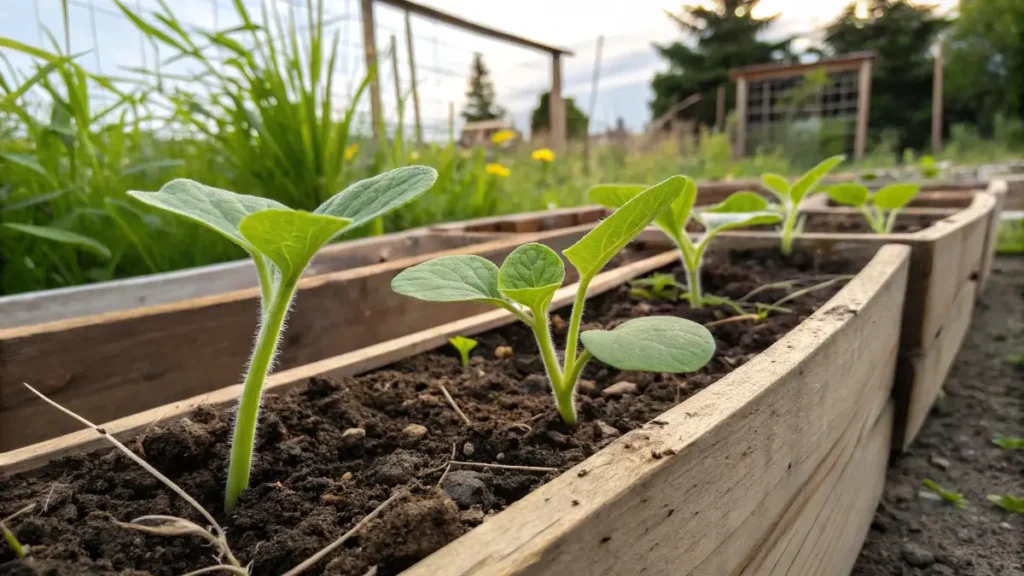
Transplanting Tips and Early Growth Challenges
Once your indoor seedlings are 3–4 weeks old and have at least two true leaves, they’re ready for transplanting. Here’s how to ensure a smooth transition:
How to Transplant Spaghetti Squash Seedlings:
- Acclimate seedlings by slowly introducing them to outdoor elements over a period of 7 to 10 days.
- Choose a sunny, well-drained spot with room for vines to sprawl.
- Dig holes deep enough to cover the entire root ball.
- Space each transplant 3–5 feet apart in rows that are 4–6 feet apart.
- Water thoroughly after transplanting.
Watch for These Early Growth Challenges:
- Leggy Seedlings
Caused by insufficient light. Use grow lights if starting indoors. - Transplant Shock
Signs include wilting and yellowing leaves. Minimize by hardening off properly. - Pests Like Cutworms or Aphids
Place collars around young stems and use neem oil sprays to deter pests. - Fungal Issues
Avoid overhead watering and ensure good air circulation.
Looking for a nutrient-packed side to serve with your squash harvest? Try our Baby Dutch Yellow Potatoes Recipe —a natural match for garden-to-table meals.
Harvesting, Curing, and Storing Spaghetti Squash Seeds
When and How to Harvest Mature Spaghetti Squash for Seed Use
To harvest high-quality seeds, timing is critical. Spaghetti squash must be fully mature on the vine before harvesting if you plan to save its seeds.
Signs Your Spaghetti Squash Is Ready for Harvest:
- The skin turns deep yellow and resists puncture when pressed with a fingernail.
- The stem becomes brown, dry, and corky.
- Vines begin to wither and die back naturally.
Harvesting Steps:
- Cut with Care – Use garden shears or a sharp knife to cut the squash, leaving 2–3 inches of stem.
- Handle Gently – Avoid dropping or bruising the fruit to prevent spoilage during curing.
- Cure Before Cutting Open – Let the squash sit in a dry, warm (80–85°F) place for 10–14 days to allow the seeds inside to finish maturing.
This curing step is essential for fully developed seeds. Skipping it may result in immature seeds that won’t germinate.
Drying, Curing, and Long-Term Storage Tips for Seeds
Once the squash has cured, follow these steps to collect and store seeds that stay viable for seasons to come.
1. Extract the Seeds
Cut the squash and scoop out the inner pulp and seeds. Place them in a bowl of water to separate the viable seeds—they’ll sink to the bottom.
2. Clean and Rinse
Remove pulp, rinse seeds thoroughly, and strain.
3. Dry Properly
Spread seeds on a non-stick surface (like wax paper) in a single layer. Let them dry for 7–10 days, turning once daily for even drying.
4. Store for Longevity
Place completely dry seeds in:
- Paper envelopes for airflow
- Airtight jars with silica gel packets for humidity control
Best Storage Conditions:
- Cool (below 50°F)
- Dark (pantry or drawer)
- Dry (humidity under 50%)
Properly stored spaghetti squash seeds can remain viable for 4–6 years.
Storage Longevity Table:
| Storage Method | Expected Viability |
|---|---|
| Room temp, no seal | 1–2 years |
| Airtight in pantry | 3–4 years |
| Refrigerated in glass | 5–6 years |
Don’t miss our Homemade Canned Spaghetti Sauce for delicious ways to enjoy your harvest alongside garden-grown squash.
Troubleshooting Common Spaghetti Squash Seed Issues
Why Your Spaghetti Squash Seeds Might Not Germinate
It can be frustrating when you’ve prepped everything, only to find your seeds aren’t sprouting. Fortunately, most problems are easy to fix once you identify the cause. Here’s a breakdown of the most common reasons spaghetti squash seeds fail to germinate:
- Old or Non-Viable Seeds
Seeds lose potency over time. If your seeds are more than 3–4 years old and weren’t stored properly, germination rates drop drastically. - Improper Drying Before Storage
Seeds that were not fully dried may rot or mold during storage, making them unviable. - Cold Soil Temperatures
Spaghetti squash seeds require warm soil—at least 60°F—to sprout. In cooler temperatures, they go dormant or rot. - Waterlogged Soil
Excessive moisture leads to damping-off (a fungal condition that kills seeds or young seedlings). Keep soil moist, not soggy. - Poor Seed Depth
Planting too deep or too shallow can prevent successful germination. Stick to 1 inch deep for best results.
Troubleshooting Table:
| Problem | Cause | Solution |
|---|---|---|
| No sprouts after 10 days | Cold or old seeds | Warm soil, try fresh batch |
| Mold on soil | Overwatering or poor airflow | Improve drainage and airflow |
| Weak sprouts | Low light or compact soil | Use grow lights, loosen soil |
| Rotting seeds | Undried seeds or soggy soil | Dry seeds fully, water moderately |
Pests, Mold, and Cross-Pollination Problems to Avoid
Even after germination, spaghetti squash seedlings can face growing threats from pests and environmental conditions. Here’s how to protect them:
Common Pests:
- Squash Bugs – Suck sap and wilt leaves. Use neem oil or insecticidal soap.
- Cutworms – Chew seedlings at the base. Use collars or diatomaceous earth around stems.
- Cucumber Beetles – Spread bacterial wilt. Trap with yellow sticky cards.
Mold and Fungal Issues:
- Caused by overwatering, crowded plants, or poor ventilation.
- Water at the base of the plant and mulch around the soil to avoid splashing.
Cross-Pollination Risks:
If you’re saving seeds, keep spaghetti squash isolated from other squashes (like acorn or zucchini) to avoid hybrid fruit. Bees can carry pollen across ½ mile or more.
Prevent Cross-Pollination With:
- Planting only one variety at a time
- Using physical barriers like row covers
- Hand-pollinating and then isolating flowers
Looking for more tips on clean, homegrown recipes?
Don’t miss our Lemon Balm Tea —perfect with roasted squash seeds for a healthy afternoon snack.
Conclusion
Growing spaghetti squash from seed is more than just a gardening project—it’s a rewarding cycle of sustainability, flavor, and self-reliance. Whether you’re roasting seeds for snacks, planting them to grow a hearty harvest, or saving them for seasons to come, understanding how to handle spaghetti squash seeds the right way makes all the difference.
From selecting the best seeds, timing your planting just right, to managing pests and storing your future harvests, this guide equips you with everything you need. So next time you crack open a squash, think twice before tossing the seeds—you just might be holding next year’s garden in your hands.
Check out more garden-to-table recipes like our Edamame Spaghetti Recipe and keep your kitchen fresh, flavorful, and homegrown.
FAQs
Can you eat the seeds of spaghetti squash?
Yes, spaghetti squash seeds are edible. They can be eaten raw, though roasting is more common. Roasted spaghetti squash seeds are crunchy, flavorful, and rich in protein, fiber, and minerals.
When should you plant spaghetti squash seeds?
You should plant spaghetti squash seeds outdoors 2 weeks after your area’s last spring frost, when the soil is at least 60°F. In colder zones, start them indoors 3–4 weeks prior.
Can I plant spaghetti squash seeds from the grocery store?
Yes, but success depends on the squash type. Heirloom or non-hybrid squash work best. Hybrid varieties may not produce true-to-type fruits and often have poor germination.
Can I save spaghetti squash seeds to plant?
Absolutely. Choose seeds from a mature, fully ripened squash, clean them, dry thoroughly for 7–10 days, and store them in a cool, dry place. They remain viable for up to 6 years if stored properly.
Do you have to dry spaghetti squash seeds before planting?
Yes. Drying prevents rot and improves germination. Lay seeds out in a single layer in a well-ventilated, dark space and let them dry for at least 7 days before storing or planting.
What should you not plant next to spaghetti squash?
Avoid potatoes, fennel, brassicas (like cabbage), and other cucurbits such as melons and cucumbers. These compete for nutrients or invite similar pests that harm spaghetti squash.