
Jello Lemon Meringue Pie: The Ultimate Guide to a Perfect Zesty Dessert
Jello lemon meringue pie is a delightful twist on a classic dessert that brings together the tangy brightness of lemon, the creamy texture of gelatin filling, and the light, airy sweetness of meringue. Whether you’re preparing this pie for a summer cookout, holiday gathering, or simply to satisfy a citrus craving, getting it just right can be a game-changer. In this comprehensive guide, we’ll explore everything from choosing the best ingredients and avoiding common pitfalls to mastering the meringue and achieving the perfect balance of flavors.
Table of Contents
Introduction to Jello Lemon Meringue Pie
What Makes Jello Lemon Meringue Pie So Popular?
Jello lemon meringue pie holds a special place in American dessert culture. The marriage of tart lemon gelatin and sweet meringue creates a unique contrast that appeals to many palates. Unlike traditional lemon custard pies, this version uses gelatin (often in the form of lemon Jell-O) for a firmer, more vibrant filling that sets beautifully and slices cleanly. It’s a no-fuss alternative that requires less cooking time but delivers on flavor. Plus, it brings a refreshing, chilled element that’s perfect for warm-weather occasions or whenever you crave something light yet indulgent.
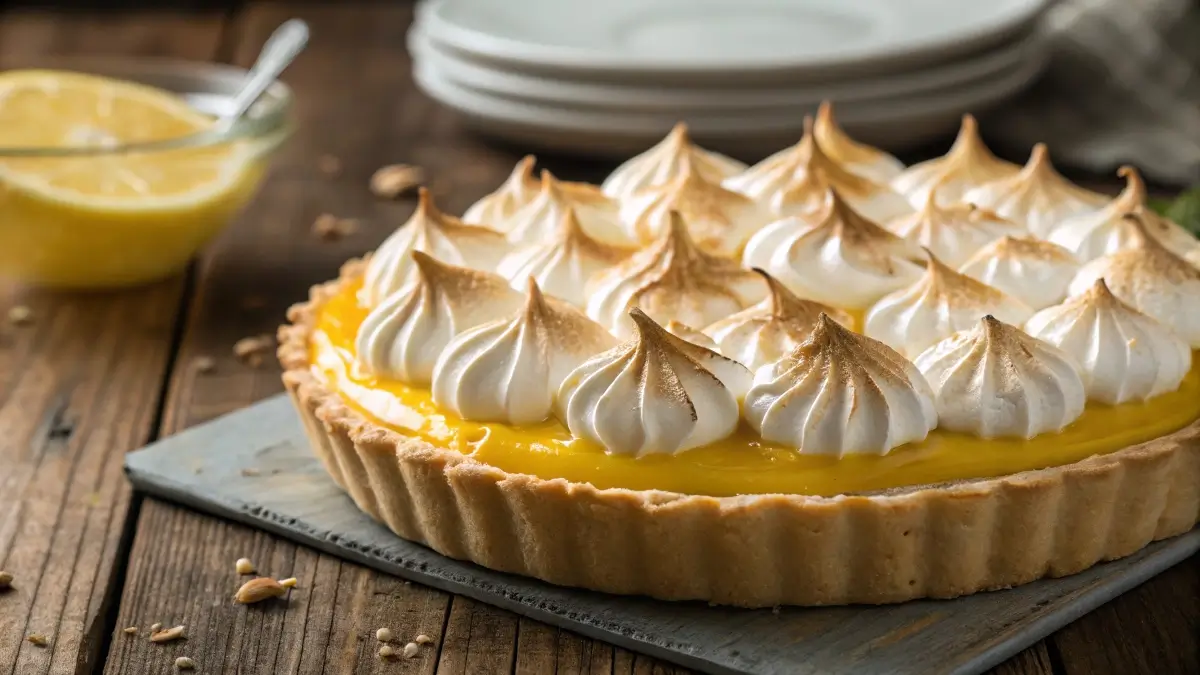
This pie also stands out for its visual appeal — the bright yellow filling and golden-brown peaks of meringue make it a centerpiece-worthy dessert. Home bakers love it for its simplicity, and guests remember it for its zesty punch and melt-in-your-mouth topping.
The History and Origins of Lemon Meringue Pie
Lemon meringue pie has roots dating back to the 18th century, with the earliest versions attributed to European bakers who combined sweet and sour flavors in desserts. The addition of meringue became popular in the 19th century as techniques for whipping egg whites advanced, creating that signature fluffy topping we know today. The use of gelatin or Jell-O in lemon pies is a more modern adaptation that grew in popularity in mid-20th century America, especially during the convenience food boom.
Using Jell-O lemon gelatin offered a quicker route to creating that signature tart filling, and busy home cooks embraced it. The Jello lemon meringue pie became a staple at potlucks, family dinners, and celebrations, celebrated for its ease of preparation and crowd-pleasing flavor.
Today, this pie is a nostalgic favorite that continues to charm both seasoned bakers and those just starting their dessert journeys.
Ingredients for the Best Jello Lemon Meringue Pie
Essential Ingredients and Why They Matter
Crafting the perfect jello lemon meringue pie starts with selecting quality ingredients. Each component plays a crucial role in achieving that ideal balance of tartness, sweetness, and texture.
- Lemon-flavored gelatin (such as Jell-O Lemon Gelatin) – This key ingredient brings a vibrant citrus taste and gives the filling its firm, sliceable consistency. Unlike custard-based pies, the gelatin creates a glossy finish and that classic, satisfying wobble.
- Water (boiling and cold) – Water activates and dissolves the gelatin crystals. Getting the ratio of boiling to cold water right ensures proper setting without becoming rubbery or too soft.
- Prepared Pie Crust (graham cracker or pastry) – The crust provides a sturdy base and a subtle sweetness or richness that complements the tangy filling. Graham cracker crusts add a lovely crunch, while pastry crusts offer a buttery note.
- Egg Whites – Fresh egg whites are essential for the meringue’s structure. They whip into stiff peaks, creating the iconic cloud-like topping.
- Granulated Sugar – Sugar stabilizes the egg whites and sweetens the meringue. Without it, the meringue would collapse or weep.
- Cream of Tartar – A small amount of cream of tartar helps egg whites maintain their structure and prevents overbeating. It’s the secret to long-lasting, glossy peaks.
- Vanilla Extract (optional) – A splash of vanilla adds warmth and depth to the meringue’s flavor.
Getting these ingredients right makes all the difference between a so-so pie and a showstopper.
Substitutes and Variations for Allergies or Preferences
If you need to adjust the recipe for dietary restrictions or simply want to try a twist on the classic, here are some reliable swaps:
- Cream of Tartar Substitute – If you don’t have cream of tartar, use an equal amount of lemon juice or white vinegar. Both offer the acidity needed to stabilize the egg whites, though they may add a faint tang to the meringue.
- Vegan Meringue – For a plant-based option, consider using aquafaba (the liquid from canned chickpeas) in place of egg whites. It whips up surprisingly well and can be sweetened and flavored similarly to traditional meringue.
- Gluten-Free Crust – Opt for a gluten-free graham cracker crust or make your own using gluten-free cookies and melted butter. Ensure the crust is well-pressed and pre-baked for a crisp base.
- Low-Sugar Option – Use a sugar-free lemon gelatin and reduce sugar in the meringue, or use a sugar substitute that’s suitable for baking, like erythritol or stevia blends. Keep in mind that alternative sweeteners may slightly alter the meringue’s texture.
- Alternative Crusts – For added flair, try a gingersnap crust or a vanilla wafer crust. These variations pair well with the lemon’s zesty flavor.
Choosing the right substitutes ensures that everyone at the table can enjoy a slice, no matter their dietary needs.
How to Make Jello Lemon Meringue Pie Step-by-Step
Creating a stunning jello lemon meringue pie at home is easier than you might think, especially if you break it down into simple stages. From preparing the crust to perfecting the meringue, this step-by-step guide will help you achieve bakery-quality results.
Preparing the Crust for Lemon Meringue Pie
The foundation of any great pie is the crust, and with jello lemon meringue pie, it’s crucial that the crust provides a firm, crisp base to support the soft filling.
- Choose your crust — A graham cracker crust is the most popular for this recipe, but a baked pastry crust works too. If using store-bought, ensure it’s fresh and not cracked.
- Pre-bake the crust — If you’re making your crust from scratch or using an unbaked pastry shell, pre-bake it at 350°F for 8-10 minutes until golden and crisp. Let it cool completely before adding the filling.
- Prevent sogginess — To avoid a soggy crust, you can brush it lightly with beaten egg white and return it to the oven for 2 minutes. This seals the surface and helps keep it crisp.
Check out our peach pie recipe with canned peaches for more crust tips that work with other fruity desserts.
Cooking the Jello Lemon Filling to Perfection
The filling is what gives jello lemon meringue pie its signature bright color and refreshing citrus flavor. It’s also where precision matters most for a firm, sliceable texture.
- Dissolve gelatin — In a medium bowl, combine one package of lemon gelatin with ¾ cup of boiling water. Stir until the gelatin is completely dissolved, about 2 minutes.
- Add cold water — Stir in ½ cup of cold water. This helps bring down the temperature so the filling sets evenly.
- Chill slightly — Let the mixture cool until it’s just starting to thicken (about 20-30 minutes in the fridge). It should be syrupy but not firm. This ensures it spreads smoothly into the crust without soaking through.
- Pour into crust — Gently pour the filling into your prepared crust, smoothing the top with a spatula if needed.
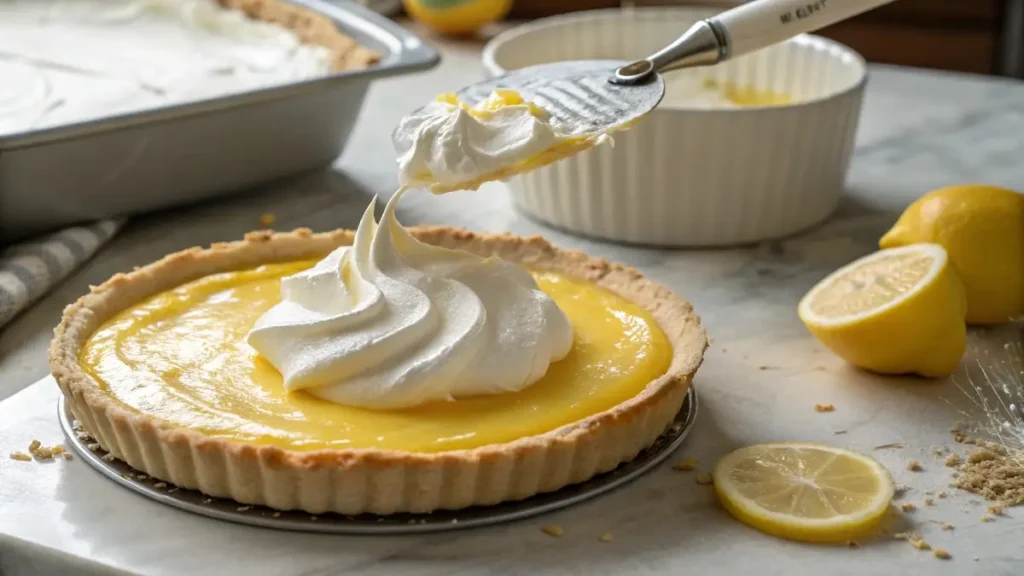
Whipping Up the Fluffiest Meringue Topping
The meringue is what takes this pie from simple to spectacular. Here’s how to nail it:
- Whip the egg whites — In a clean, dry bowl, beat 3 egg whites on medium speed until foamy. Add ¼ teaspoon cream of tartar or substitute, then beat on high until soft peaks form.
- Add sugar gradually — With the mixer running, add 6 tablespoons of sugar one tablespoon at a time. Continue beating until stiff, glossy peaks form. Avoid overbeating — the meringue should be smooth and shiny.
- Top the pie — Gently spread the meringue over the filling, ensuring it meets the crust edges to seal it completely. Use the back of a spoon to form decorative peaks on top.
- Bake — Bake at 350°F for 10-12 minutes, or until the meringue is golden brown. Let cool at room temperature before refrigerating.
Don’t miss our delicious Toll House cookies for another classic dessert to enjoy alongside your pie.
Common Mistakes and How to Fix Them
Even seasoned bakers can encounter issues when making jello lemon meringue pie. Let’s break down the most common problems and how to fix them so your pie turns out perfectly every time.
Why Did My Lemon Meringue Pie Turn Out Runny?
A runny lemon meringue pie filling is one of the most frustrating outcomes, especially when you’ve put effort into crafting a beautiful dessert. Here are the typical culprits:
- Gelatin wasn’t fully dissolved — If the gelatin granules didn’t completely dissolve in the boiling water, the filling won’t set correctly. Always stir thoroughly for at least two minutes until no grains remain.
- Incorrect chilling time — Pouring the filling into the crust while it’s too hot or before it’s slightly thickened can cause it to seep into the crust and stay runny. Allow it to cool until it’s syrupy but pourable.
- Too much liquid — Stick to the exact water ratios on the gelatin packet. Adding extra water to stretch the filling can result in a soft or watery texture.
- Underbaked meringue — Sometimes, what looks like runny filling is actually weeping meringue. Ensure your meringue is baked long enough to set the sugar.
Looking for inspiration? Try our easy chocolate desserts to boost your dessert table while mastering your meringue technique.
What Causes Liquid at the Bottom of a Lemon Meringue Pie?
If you notice a layer of liquid pooling at the bottom or between the filling and crust, here’s what may have happened:
- Meringue not sealed to crust — It’s essential that the meringue touches the crust all around. This seals in the filling and prevents moisture from forming between layers.
- Overbeaten meringue — Meringue beaten past stiff peaks can break down during baking, leading to separation and weeping.
- Pie cooled too quickly — Rapid temperature changes can cause condensation. After baking, cool your pie gradually at room temperature before refrigerating.
- Humidity and sugar ratio — High humidity and too little sugar in the meringue can also cause weeping. Stick to the recipe’s sugar amounts to help stabilize the egg whites.
Baking Tips for the Best Results
Mastering the art of baking a jello lemon meringue pie comes down to a few key techniques. Here’s how to avoid common pitfalls and achieve that show-stopping look and flavor every time.
Is It Better to Put Meringue on a Hot or Cold Pie?
This question pops up often, and the answer makes a big difference in how your pie turns out.
- Always spread meringue over hot filling — When you add meringue to hot lemon filling, the bottom of the meringue starts to cook immediately. This creates a secure seal that helps keep the meringue from shrinking and minimizes the chances of weeping or separating as it cools.
- Cold filling leads to separation — If you spread meringue over chilled or cool filling, steam can’t rise into the meringue to help it set. This often results in a gap forming between the filling and topping.
- Quick tip — Work quickly once your filling is ready. Keep the meringue mixture ready so you can spread it as soon as the filling is poured into the crust.
Discover great ideas like our gluten-free sourdough bread if you’re experimenting with homemade crusts or complementary dishes.
How to Keep a Lemon Meringue Pie Crust from Getting Soggy
Nobody wants a soggy pie crust. Here’s how to keep yours crisp and delicious:
- Pre-bake the crust fully — Whether you’re using pastry or graham cracker crust, pre-bake it until golden brown. This creates a moisture barrier that helps resist sogginess.
- Seal the crust — After pre-baking, brush the crust with a thin layer of beaten egg white and return it to the oven for 2-3 minutes. This creates an extra protective layer that keeps the filling from soaking in.
- Cool before filling — Let the crust cool completely before adding the hot gelatin mixture. This prevents steam from softening the crust.
- Serve promptly — Jello lemon meringue pie is best served the day it’s made. The longer it sits, the more chance moisture has to affect the crust.
Jello Lemon Meringue Pie Variations
Once you’ve mastered the classic jello lemon meringue pie, it’s fun to get creative. Variations allow you to customize the dessert for different occasions, preferences, and dietary needs—without losing that signature bright lemon flavor.
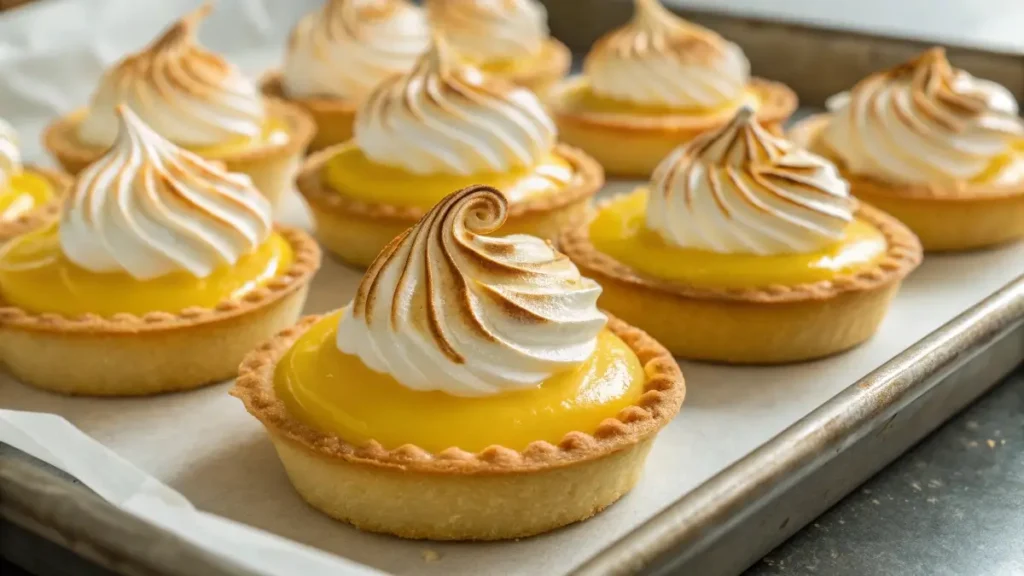
Mini Jello Lemon Meringue Pies for Individual Servings
Mini pies are perfect for parties, picnics, or anytime you want a personal-sized treat.
- Use muffin tins or mini tart pans — Press graham cracker or pastry crust into the bottoms and sides of the tins. Be sure to pack it tightly so it holds its shape after baking.
- Pre-bake as you would a full pie — About 6-8 minutes at 350°F should be enough for mini crusts. Cool completely before filling.
- Portion the filling — Mix your lemon gelatin filling as usual and spoon it into each crust. Allow to set slightly before topping with meringue.
- Bake meringue until golden — Watch closely; smaller pies will brown faster (about 6-8 minutes).
These mini versions are not only adorable but also easier to serve at gatherings.
Gluten-Free and Dairy-Free Options
With just a few tweaks, you can make a jello lemon meringue pie that fits gluten-free and dairy-free diets:
- Gluten-free crust — Use gluten-free graham crackers or cookies crushed and mixed with melted coconut oil or vegan butter. Press firmly into your pie plate and pre-bake as usual.
- Dairy-free filling — The classic gelatin filling is already dairy-free. Just check the packaging to confirm it’s free from any hidden dairy ingredients.
- Vegan meringue alternative — Swap egg whites for aquafaba (the liquid from canned chickpeas). It whips up to stiff peaks just like egg whites and can be sweetened and flavored similarly.
This way, everyone can enjoy a slice without compromising on taste or texture.
Storing and Serving Jello Lemon Meringue Pie
Your jello lemon meringue pie is a masterpiece—but storing and serving it the right way ensures it stays delicious and picture-perfect. Let’s cover best practices to help you make the most of your creation.
Best Practices for Storing and Keeping It Fresh
Once your pie is baked and cooled, proper storage is key to maintaining its texture and flavor.
- Refrigerate promptly — After the pie reaches room temperature, refrigerate it uncovered for the first hour to let the meringue fully set. After that, loosely cover it with a pie dome or tented foil (avoid plastic wrap touching the meringue—it can cause sticking and collapse).
- Ideal storage time — A jello lemon meringue pie is best enjoyed within 1-2 days. The longer it sits, the higher the chance of weeping meringue or a soft crust.
- Avoid freezing — Freezing is not recommended for this pie. The gelatin filling can break down and become watery upon thawing, and the meringue will likely lose its airy texture.
- Serve chilled — This pie shines when served cold straight from the fridge, especially on warm days.
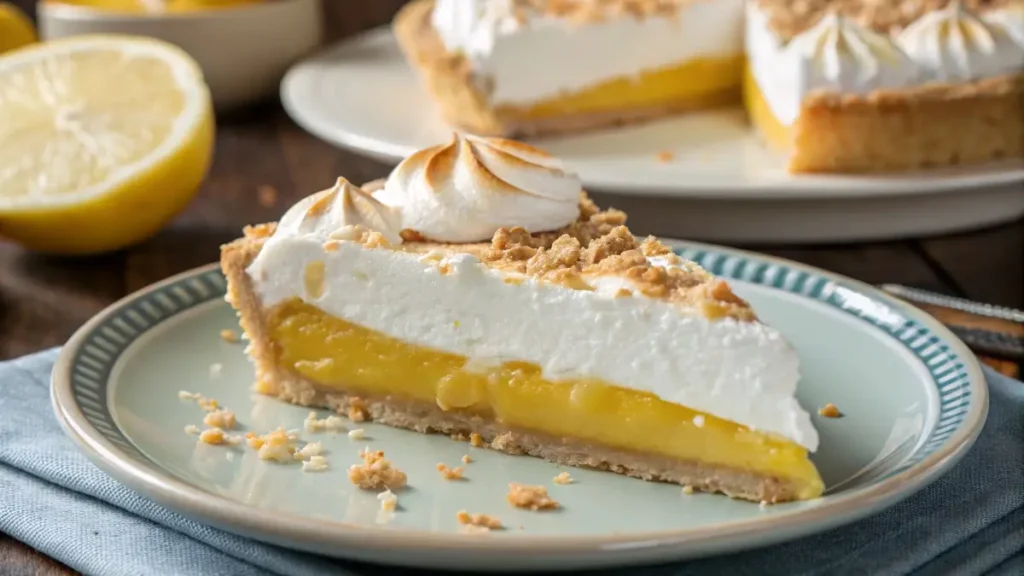
Serving Ideas and Presentation Tips
Make your jello lemon meringue pie as impressive to serve as it is to eat:
- Use a hot knife — Run a sharp knife under hot water, wipe it dry, and then slice the pie. This ensures clean cuts through both the filling and meringue.
- Add garnishes — A twist of lemon zest, a thin lemon slice, or even fresh mint leaves add a touch of elegance to each serving.
- Pairings — Serve with fresh berries or a light fruit salad for a refreshing contrast to the pie’s richness.
- Portion with care — Because the filling is delicate, use a pie server with a thin edge to lift slices cleanly.
Nutritional Information and Health Considerations
When enjoying a slice of jello lemon meringue pie, it’s helpful to know what’s inside. Whether you’re counting calories or just curious about how this zesty dessert fits into your diet, here’s a detailed look at its nutritional profile and some lighter options.
Calories and Macros Breakdown
The nutritional values can vary slightly depending on the crust type, meringue sweetness, and portion size, but here’s an approximate breakdown for a standard slice (1/8 of a 9-inch pie):
| Nutrient | Amount per slice |
|---|---|
| Calories | 280-320 |
| Total Fat | 10-15g |
| Saturated Fat | 4-6g |
| Carbohydrates | 42-48g |
| Sugars | 30-35g |
| Protein | 3-5g |
| Fiber | 0-1g |
| Sodium | 180-220mg |
- Most of the calories come from the sugar in the filling and meringue and the fat in the crust (especially if using a buttery pastry base).
- The dessert is generally low in protein and fiber but rich in fast energy thanks to its carbohydrate content.
Lightening Up Your Jello Lemon Meringue Pie
If you’re looking to reduce the calorie load without sacrificing flavor, try these easy adjustments:
- Use sugar-free lemon gelatin — This cuts down significantly on sugar and overall calories.
- Reduce sugar in the meringue — You can get away with using slightly less sugar without compromising stability. Try cutting back by 1-2 tablespoons.
- Opt for a lighter crust — A gluten-free or almond meal crust with less butter can save calories and provide a subtle nutty flavor.
- Make mini pies — Smaller servings can help with portion control while still satisfying that lemon meringue craving.
- Pair with fruit — Serving smaller slices alongside fresh berries or melon helps create a balanced, refreshing dessert plate.
Conclusion: Master Your Jello Lemon Meringue Pie Every Time
Whether you’re making your first jello lemon meringue pie or refining a family favorite recipe, following these tips will help you achieve a dessert that’s as stunning as it is delicious. From selecting the right ingredients to sealing your meringue just right, every step brings you closer to pie perfection. This pie remains a nostalgic, crowd-pleasing treat that’s easier to make than it looks—perfect for gatherings, celebrations, or just because. Check out our irresistible banana waffles for another sweet option that pairs beautifully with citrus desserts.
FAQs
What’s the Difference Between Lemon Pie and Lemon Meringue Pie?
While both desserts highlight the bright, tangy flavor of lemon, there’s a key distinction:
Lemon pie generally refers to any pie with a lemon-flavored filling. This could be a custard, curd, or gelatin filling. It often features a simple pastry crust and may be topped with whipped cream or served plain.
Lemon meringue pie is specifically topped with meringue—a sweet, fluffy cloud of whipped egg whites and sugar. The meringue is baked until golden, adding a light, airy texture that balances the tart filling.
In short, all lemon meringue pies are lemon pies, but not all lemon pies are lemon meringue pies!
What Is a Substitute for Cream of Tartar in Lemon Meringue Pie?
If you find yourself out of cream of tartar when making your meringue, don’t worry—there are easy substitutes:
Lemon juice — Use the same quantity (¼ teaspoon of lemon juice per egg white) to help stabilize the egg whites.
White vinegar — Also works well at the same ratio as lemon juice. It provides the necessary acidity to strengthen the meringue.
Both options will give you a stable, glossy meringue with no noticeable flavor difference.
Why Did My Lemon Meringue Pie Turn Out Runny?
Runny filling can result from:
Incomplete gelatin dissolution
Adding too much water
Not letting the filling thicken slightly before pouring into the crust
Always follow exact proportions and instructions for best results.
Why Is There Liquid at the Bottom of My Lemon Meringue Pie?
That liquid is usually a result of:
Meringue not sealed to the crust
Overbeaten egg whites
Rapid temperature changes after baking
Cool your pie gradually and ensure the meringue connects with the crust all around.
Is It Better to Put Meringue on a Hot or Cold Pie?
It’s best to put meringue on a hot filling. The heat helps seal the meringue, prevents gaps, and reduces weeping.
How Do You Keep a Lemon Meringue Pie Crust from Getting Soggy?
Pre-bake the crust thoroughly
Seal it with a light egg white wash
Allow it to cool before adding the filling
This keeps the crust crisp and delicious.