
Brown Butter Snickerdoodles Recipe – The Ultimate Chewy, Buttery Cookie Guide
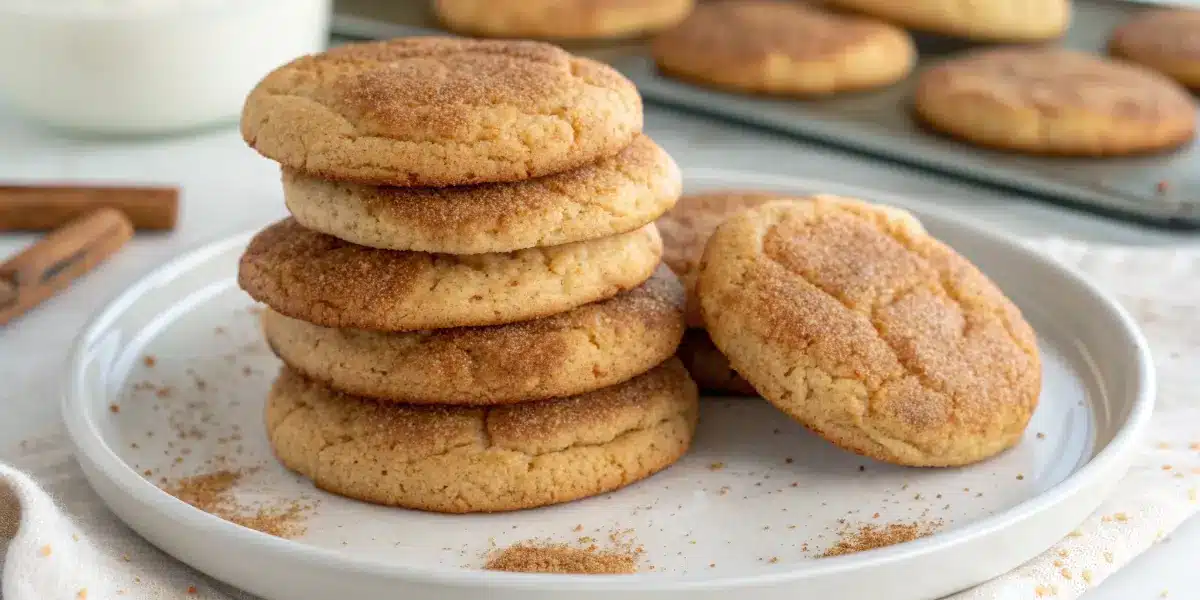
There’s something special about the aroma of brown butter mingling with cinnamon sugar—it’s cozy, nostalgic, and downright irresistible. If you’ve ever wanted to elevate the classic snickerdoodle into something richer and more sophisticated, this brown butter snickerdoodles recipe is your answer. With the nutty depth of browned butter and the warmth of cinnamon, these cookies strike the perfect balance between crispy edges and soft, chewy centers. Whether you’re baking for the holidays or simply craving something comforting, this recipe will quickly become your go-to treat.
Looking for inspiration? Try our delicious Toll House Cookies for another chewy classic that’s easy to master.
Table of Contents
The Magic of Brown Butter Snickerdoodles
What Makes Brown Butter Snickerdoodles So Irresistible
The secret lies in the transformation of ordinary butter into golden perfection. When butter is gently cooked until the milk solids brown, it creates a nutty, caramel-like aroma that completely changes the flavor profile of your cookies. This isn’t just butter—it’s browned butter magic. The brown butter snickerdoodles recipe takes that comforting cinnamon-sugar coating you already love and infuses it with a toasted, rich undertone that lingers in every bite.
When you combine the deep flavors of brown butter with the tang of cream of tartar, the result is a cookie that’s not too sweet, slightly tangy, and incredibly aromatic. Each bite offers a crisp sugar-coated shell and a chewy, buttery interior that melts in your mouth.
For another cozy dessert with a cinnamon twist, don’t miss our Cinnamon Pull Apart Bread Guide.
Why Brown Butter Elevates Traditional Snickerdoodles
Traditional snickerdoodles rely on softened butter to create a soft, puffy texture. But when you brown the butter, you’re building layers of flavor before you even start mixing. The heat caramelizes the milk solids, releasing a rich aroma that blends beautifully with cinnamon and sugar. This step adds a toasted nuttiness and a depth you just can’t get from regular butter.
Moreover, browning butter removes some moisture, which results in a slightly denser, chewier cookie—exactly what makes these snickerdoodles so satisfying. The flavor profile leans toward a toffee-like sweetness, offering a grown-up version of the cookie you remember from childhood.
Don’t miss our Amish Cinnamon Bread Recipe for another dessert that celebrates buttery, cinnamon-rich flavors.
Understanding Brown Butter
The Trick to Perfect Brown Butter for Cookies
Brown butter isn’t difficult to make—but it does demand patience and attention. The key is to cook the butter slowly so it can transform from pale yellow to a deep golden brown without crossing into burnt territory. To make the perfect base for your brown butter snickerdoodles recipe, start with unsalted butter in a light-colored pan. This allows you to easily see the color change as it cooks.
Melt the butter over medium heat, swirling the pan gently as the milk solids sink to the bottom. You’ll hear a soft crackle as the water content evaporates, and soon, small brown flecks will appear. The butter should smell nutty and slightly sweet—almost like toasted hazelnuts. That’s your cue to remove it from the heat. Pour it immediately into a heatproof bowl to stop the cooking process.
Here’s the trick: let it cool for at least 20 minutes before mixing it with sugar and eggs. If it’s too hot, it will melt the sugar and ruin your cookie texture. Too cold, and it’ll solidify. Aim for that sweet spot—warm but not hot.
Don’t miss our Boursin Cheese Recipe to learn how gentle heat transforms ordinary ingredients into something luxurious and flavorful.
Common Brown Butter Mistakes to Avoid
Even experienced bakers sometimes burn their butter. The most common mistake is walking away while it’s cooking—brown butter goes from perfect to ruined in seconds. Always watch closely once it starts foaming. Use a rubber spatula to stir and scrape the bottom to prevent milk solids from sticking and burning.
Another mistake is using a dark pan, which makes it harder to judge the color. If you can’t see the golden hue clearly, you’ll likely overdo it. Also, avoid overheating; once the butter starts browning, lower the heat slightly. Finally, never cover the pan—steam needs to escape for the butter to develop that nutty flavor.
Perfecting brown butter may sound intimidating, but once you’ve mastered it, you’ll use it in everything from cookies to sauces. Discover great ideas like our Pecan Cookies Recipe that pair beautifully with browned butter for extra richness.
Key Ingredients for the Perfect Brown Butter Snickerdoodles Recipe
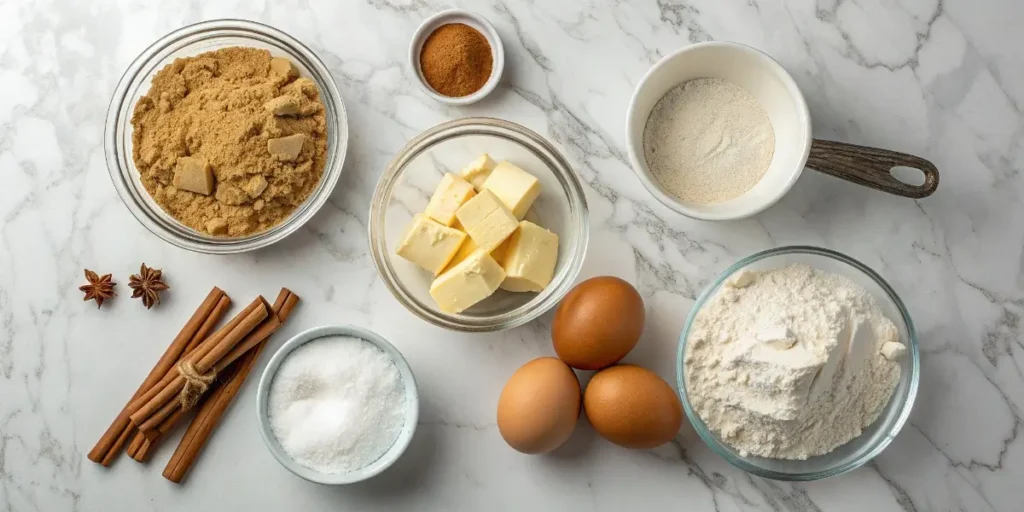
Essential Ingredients and Their Role
Every chewy, golden cookie starts with simple ingredients, but in this brown butter snickerdoodles recipe, each one serves a purpose that’s more than just flavor. Let’s break it down.
Butter: Browned butter is the heart of this recipe—it adds a toasty, nutty depth that elevates these cookies from ordinary to bakery-style. Always use unsalted butter so you can control the salt balance.
Sugar: A combination of white and brown sugar creates that perfect chewiness. White sugar helps with crisp edges, while brown sugar keeps the centers soft.
Eggs: They bind the ingredients, but they also add moisture, helping the dough stay rich and chewy.
Flour: All-purpose flour gives the cookies structure. For gluten-free options, a 1:1 gluten-free blend works beautifully.
Cream of Tartar: The classic ingredient that gives snickerdoodles their signature tang and soft texture. It reacts with baking soda to create lift and chewiness.
Cinnamon: The spice that defines snickerdoodles. Combined with sugar, it forms the irresistible coating that crackles as it bakes.
Salt & Vanilla: Salt enhances all the flavors, and vanilla ties the nutty butter and cinnamon together for that warm, nostalgic aroma.
If you enjoy simple baking staples that deliver incredible results, check out our 3 Ingredient Biscuit Recipe (No Buttermilk) for another easy yet delicious bake.
Choosing the Right Butter, Sugar, and Spices
The type of butter you use can make or break your cookie. European-style butter contains more fat and less water than standard American butter, resulting in a richer flavor and a smoother texture when browned. However, either works—just adjust your cooling time slightly since higher-fat butter browns faster.
For sugar, try a mix: ¾ cup granulated sugar and ½ cup light brown sugar create the ideal balance. Don’t swap all of it for dark brown sugar—it can overpower the browned butter flavor.
When it comes to cinnamon, quality matters. Look for Saigon or Ceylon cinnamon for a more fragrant, sweeter note rather than the harsh bite of cheaper blends. Combine with a pinch of nutmeg or cardamom if you want extra depth without losing the snickerdoodle’s classic charm.
Looking for inspiration? Try our Peach Blueberry Cobbler for another dessert where the right sugar and spice combination make all the difference.
Step-by-Step Guide to Making Brown Butter Snickerdoodles
How to Brown Butter for Cookies Like a Pro
Making brown butter is the cornerstone of this brown butter snickerdoodles recipe. Start with one cup (two sticks) of unsalted butter in a light-colored saucepan. Melt it over medium heat, stirring often. As the butter melts, it will foam and sizzle—this means the water is evaporating. Watch closely as milk solids sink to the bottom and gradually turn golden brown. Once it smells nutty and looks amber, remove from heat immediately and pour into a heatproof bowl. Let it cool for about 20–25 minutes until it’s slightly thickened but still liquid.
Once cooled, combine the brown butter with granulated sugar and brown sugar in a mixing bowl. Beat until smooth and creamy—this helps dissolve the sugar for a uniform texture. Add eggs one at a time, mixing well after each, then stir in vanilla extract.
Next, whisk flour, baking soda, cream of tartar, cinnamon, and salt in a separate bowl. Slowly add the dry ingredients into the wet mixture. Stir until just combined; overmixing can make the cookies tough. The dough should be soft and slightly sticky. Chill it for at least 30 minutes before baking—this step intensifies the flavor and keeps your cookies thick and chewy.
For another cookie you can perfect step-by-step, don’t miss our Crumbl Cookies Recipe, where precision makes all the difference.
Mixing, Chilling, and Baking – Timing Matters
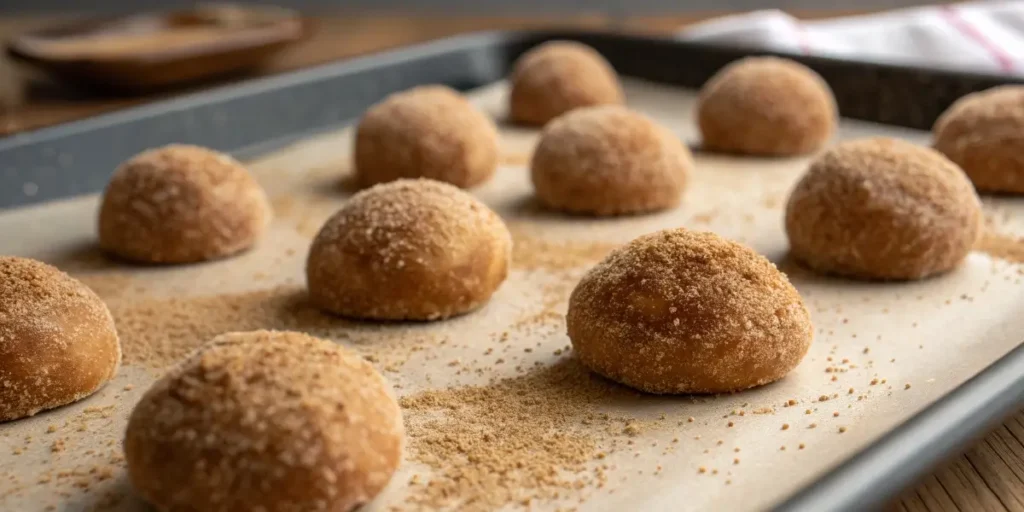
Preheat your oven to 350°F (175°C) while the dough chills. Line baking sheets with parchment paper. In a small bowl, mix ¼ cup of sugar with 2 teaspoons of cinnamon. Roll tablespoon-sized dough balls in the mixture until evenly coated.
Place them on the sheet about 2 inches apart—these cookies spread slightly as they bake. Bake for 9–11 minutes, or until the edges are just golden and the centers look soft but set. Remember, they’ll continue to bake on the sheet after you remove them from the oven.
Once baked, allow them to cool on the sheet for 5 minutes before transferring to a wire rack. The result? Cookies that are perfectly chewy in the center with crisp, cinnamon-coated edges.
If you love soft, melt-in-your-mouth desserts, check out our Amish Apple Cake Recipe for another cozy, cinnamon-forward treat.
Baking Tips and Techniques
How to Know When Snickerdoodles Are Ready
The trick to perfect snickerdoodles lies in timing. Pull them out too early, and they’ll collapse; bake them too long, and they’ll dry out. The sweet spot is when the cookies have set edges but still look slightly soft in the center. This ensures that once cooled, you’ll have chewy middles surrounded by lightly crisp edges.
For this brown butter snickerdoodles recipe, check at the 9-minute mark. The tops should appear puffy with small cracks, and the cinnamon sugar coating will have deepened in color. Don’t wait for a dark brown hue—light golden is ideal. Once out of the oven, let them rest on the baking sheet for 5 minutes. This residual heat finishes the bake gently, preventing overbaking.
Pro Tip: Ovens vary! If your first batch spreads too much or bakes unevenly, refrigerate your dough longer or use an oven thermometer to check for temperature accuracy.
If you enjoy mastering baking timing, learn more with our Apple Dutch Baby Recipe, another dish that’s all about precision and heat control.
How Long to Let Brown Butter Cool for Cookies
This might seem like a small detail, but it’s crucial. Brown butter that’s too warm will melt the sugars and cause your dough to spread excessively. On the flip side, butter that’s too cool will solidify, making it difficult to blend smoothly.
For best results, cool brown butter for 20–25 minutes at room temperature. It should feel slightly warm to the touch but no longer hot. If you’re short on time, you can speed things up by placing the bowl in the fridge for 10 minutes—just don’t let it harden.
Remember: balance is key. The goal is smooth incorporation and a silky dough that’s easy to handle.
Don’t miss our Lemon Oatmeal No-Bake Cookies for another dessert where temperature control can make or break the texture.
Common Snickerdoodle Mistakes and How to Fix Them
Avoiding Flat, Overbaked, or Dry Cookies
Even the best brown butter snickerdoodles recipe can go wrong if a few small details are overlooked. One of the most common mistakes is overmixing the dough. When you overwork the flour, gluten develops and toughens the cookies. Mix only until the dry ingredients are just incorporated for that melt-in-your-mouth chew.
Another frequent issue is skipping the chilling step. Warm dough spreads too much, leading to flat, thin cookies. Always chill for at least 30 minutes, or even overnight if time allows. This solidifies the butter, slows spreading, and deepens the caramelized flavors.
Overbaking is another culprit behind dry cookies. Snickerdoodles should be removed from the oven while the centers still look soft. Remember, they continue baking on the hot tray after removal. To ensure consistency, bake one test cookie before doing the full batch. That way, you can adjust bake time to your oven’s temperament.
Need more baking problem-solving ideas? Don’t miss our Oatmeal Raisin Cookie Recipe, which includes foolproof tips for preventing dryness and maintaining chewiness.
Balancing Texture and Flavor for Chewy Perfection
The magic of a good snickerdoodle lies in contrast: crisp edges, chewy centers, and that warm, cinnamon-rich bite. Getting that balance starts with ingredient ratios. A mix of white and brown sugar ensures the right structure, while the browned butter adds richness and depth.
If your cookies taste bland or too buttery, it’s often due to an imbalance in salt or cinnamon. Don’t skip that pinch of salt—it enhances the nutty flavor of the butter and prevents the sweetness from becoming overwhelming.
Humidity also affects texture. On humid days, add a tablespoon more flour to help maintain structure. Conversely, in dry climates, consider a teaspoon less. It’s all about finding what makes your dough hold its shape without becoming stiff.
Want another dessert where texture and flavor harmony shine? Check out our White Hot Chocolate Recipe for a silky, comforting drink to pair with these cookies.
Creative Variations on the Classic Recipe
Brown Butter Snickerdoodles with White Chocolate or Cinnamon Sugar Swirls
If you’re ready to take your brown butter snickerdoodles recipe up a notch, a few simple additions can completely transform the flavor. One of the easiest—and most delicious—variations is adding white chocolate chips. The creamy sweetness of white chocolate pairs beautifully with the nutty brown butter, creating a cookie that’s both rich and delicately sweet. Fold in about ¾ cup of white chocolate chips after the dough is mixed but before chilling.
Another variation? Create cinnamon sugar swirls by reserving a tablespoon of your cinnamon-sugar coating and lightly folding it into the dough just before baking. This technique gives you ribbons of spice running through the cookies, adding both flavor and visual appeal.
For a similar twist-on-a-classic experience, check out our Red Velvet Waffles Recipe, where familiar flavors get an elegant upgrade.
Gluten-Free and Dairy-Free Alternatives
Good news: you don’t need to sacrifice flavor if you’re avoiding gluten or dairy. For a gluten-free version, use a 1:1 gluten-free baking flour blend with xanthan gum—it ensures the cookies hold their shape while staying chewy. Be sure to chill the dough well, as gluten-free batters can be softer.
For a dairy-free version, try plant-based butter that’s labeled suitable for browning (such as Miyoko’s or Country Crock Plant Butter). It won’t brown quite like dairy butter, but it develops a light nutty flavor that still complements cinnamon beautifully.
If you want a deeper butter flavor without dairy, add a few drops of browned butter extract—yes, it exists and mimics the real thing remarkably well.
Don’t miss our Vegan Breakfast Burrito Recipe for another plant-based spin on a beloved comfort classic that proves flavor never needs to be compromised.
Serving, Storage, and Make-Ahead Tips
How to Store Snickerdoodles for Maximum Freshness
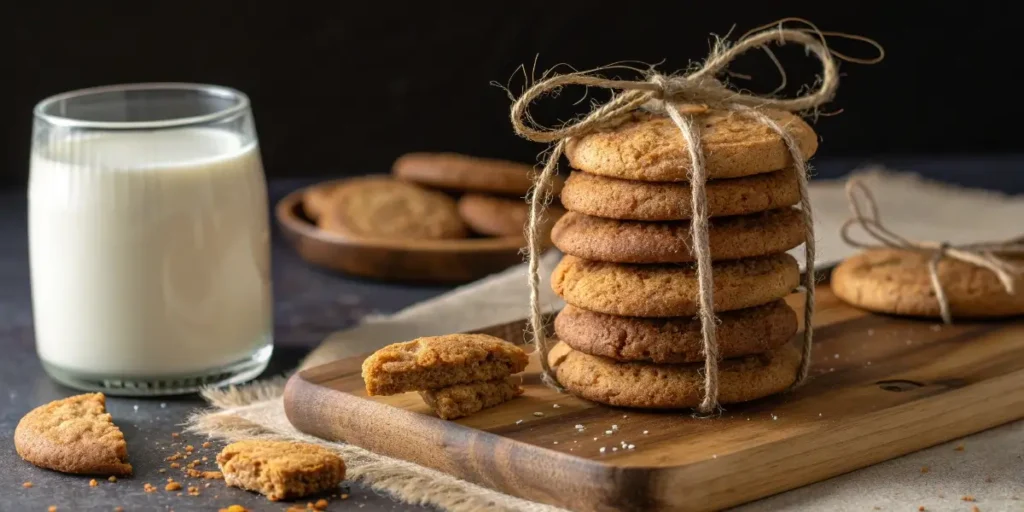
You’ve followed the brown butter snickerdoodles recipe perfectly, and now you want to keep that chewy texture and warm, nutty flavor intact. The key is proper storage. Once your cookies have cooled completely, place them in an airtight container lined with parchment paper. This keeps them from sticking together and prevents the cinnamon sugar coating from softening.
Stored at room temperature, they’ll stay soft for up to five days. To extend freshness, add a small slice of sandwich bread to the container—it helps maintain moisture without making the cookies soggy. Replace the bread every couple of days.
If you prefer freezing, snickerdoodles freeze beautifully. Simply layer cooled cookies between parchment paper in a freezer-safe container or bag. They’ll last up to three months. To enjoy, thaw at room temperature for 30 minutes or warm them in a 300°F oven for 5 minutes for that “freshly baked” feel.
Looking for more kitchen efficiency? Check out our No-Bake 4th of July Desserts for easy make-ahead sweet ideas that don’t compromise on flavor.
Freezing and Reheating for the Holidays
The holidays are the perfect time to showcase your brown butter snickerdoodles. If you’re planning ahead, freezing both the dough and baked cookies works wonders.
For dough: Roll your cookie dough into balls, coat in cinnamon sugar, and flash-freeze them on a baking sheet for about 1 hour. Once solid, transfer them into a freezer bag. When you’re ready to bake, just pop them onto a lined sheet and bake directly from frozen—add 1–2 extra minutes to the bake time.
For baked cookies: Freeze cooled cookies in airtight bags with parchment layers. To reheat, warm in a low oven (275°F) for about 6–8 minutes. This refreshes the texture without drying them out.
If you want to make your dessert table shine, don’t miss our Delicious Easter Desserts Ideas for more festive make-ahead inspiration.
Brown Butter Snickerdoodles FAQs
How to Know if Snickerdoodles Are Ready?
One of the biggest challenges in this brown butter snickerdoodles recipe is figuring out when the cookies are perfectly baked. The secret is all in the edges and color. When the edges start to turn light golden brown, and the tops are set but still soft, it’s time to pull them out. Don’t wait for the entire cookie to brown—snickerdoodles should look slightly underdone in the center. They’ll continue to bake on the hot tray after removal, resulting in that irresistible chewy texture.
Also, take note of the aroma—when your kitchen fills with the scent of toasted butter and cinnamon, your cookies are likely ready. Timing may vary by oven, so start checking around 9 minutes and adjust as needed.
For more insight on baking precision, check out our Perfect Boston Cream Cake—another recipe where timing is the difference between good and unforgettable.
What Makes Brown Butter Special?
Brown butter transforms ordinary cookies into flavor-packed delights. By cooking the butter just long enough for its milk solids to caramelize, you unlock a nutty, toffee-like flavor that adds unmatched depth. It’s a culinary trick that enhances sweetness without needing extra sugar.
The Maillard reaction is what gives brown butter its signature golden hue and complex aroma. It’s what makes this brown butter snickerdoodles recipe taste so luxurious while keeping the ingredients simple. Once you master this step, you can use brown butter in countless dishes—from pasta sauces to cakes and frostings.
Don’t miss our Delicious Toll House Cookies to see how a classic cookie benefits from the right butter technique, too.
FAQs
How to know if snickerdoodles are ready?
Snickerdoodles are ready when the edges turn lightly golden while the centers still look soft. They continue baking on the sheet for a few minutes after removal, which helps them stay chewy. Avoid overbaking—your brown butter snickerdoodles recipe should yield cookies that look slightly underdone in the middle.
How long should I let brown butter cool for cookies?
Let your browned butter cool for 20–25 minutes before using it in cookie dough. It should feel warm but not hot to the touch. If it’s too hot, it melts the sugar and ruins the texture; too cool, and it begins to solidify.
What are some common snickerdoodle mistakes?
Common snickerdoodle mistakes include:
Overmixing the dough, which makes cookies tough.
Skipping the chilling step, which leads to flat cookies.
Overbaking, which makes them dry instead of chewy.
Measure accurately and always chill your dough for best results.
What makes brown butter special?
Brown butter is made by gently heating butter until the milk solids caramelize, creating a rich, nutty aroma and deep flavor. It transforms ordinary cookies into gourmet treats and adds a toffee-like warmth that enhances the cinnamon in this brown butter snickerdoodles recipe.
What is the trick to brown butter?
The trick to brown butter is patience and precision. Melt butter over medium heat, stir continuously, and remove from heat as soon as it turns golden and smells nutty. Pour it into a bowl immediately to stop cooking and prevent burning.
What are common browned butter mistakes?
The most common mistakes include burning the butter, using a dark pan (which hides color changes), or not stirring constantly. Always use medium heat and keep an eye on the color—it can go from perfect to burnt in seconds.